Photoshop把漂亮MM照片变成画像
要点:
制作工具:Photoshop CS
制作过程:
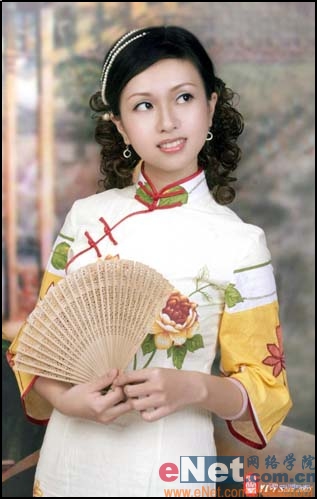
1、打开一张照片如图01所示。
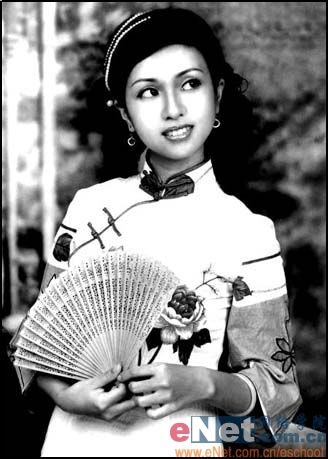
2、将“背景”层复制生成为“背景副本”层,然后选取菜单栏中的“图像”“调整”“去色”命令,将图像转换为相同颜色模式下的灰度图像,效果如图02所示。

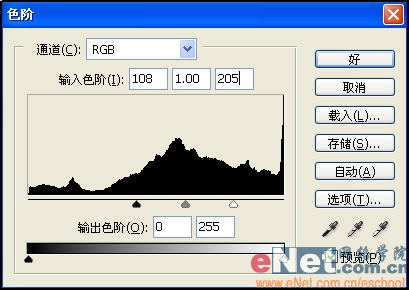
3、按“Ctrl+L”键,弹出“色阶”对话框,参数设置如图03所示,调整后的画面效果如图04所示。
4、将“背景副本”层复制生成为“背景副本2”层,然后按“Ctrl+I”键,将当前画面反相显示,画面效果如图05所示。

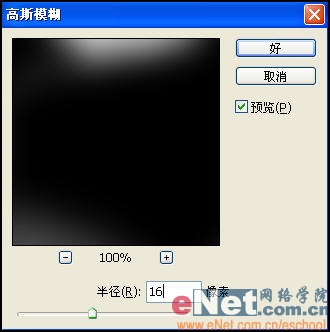
5、选择菜单栏中的“滤镜”“模糊”“高斯模糊”命令,弹出“高斯模糊”对话框,参数设置如图06所示,画面效果如图07所示。

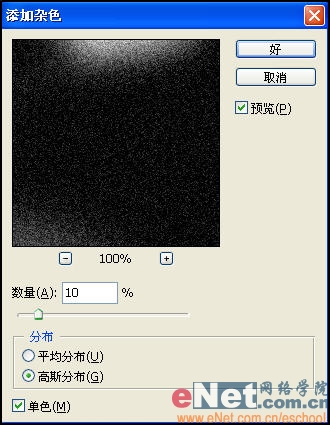
6、选择“滤镜”“杂色”“添加杂色”命令,弹出“添加杂色”对话框,参数设置如图08所示。
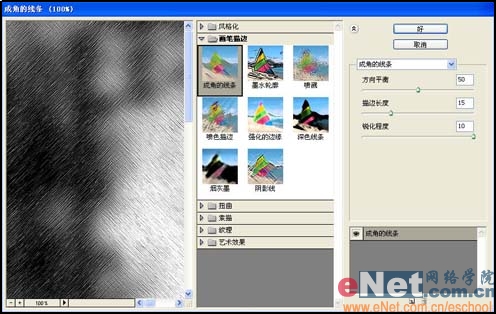
7、选择菜单栏中的“滤镜”“画笔描边”“成角的线条”命令,弹出“成角的线条”对话框,参数设置如图09所示,画面效果如图10所示。

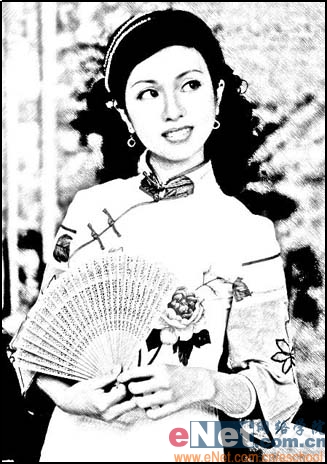
8、将“背景副本2”的图层混合模式设置为“颜色减淡”模式,更改图层混合模式后的画面效果如图11所示。
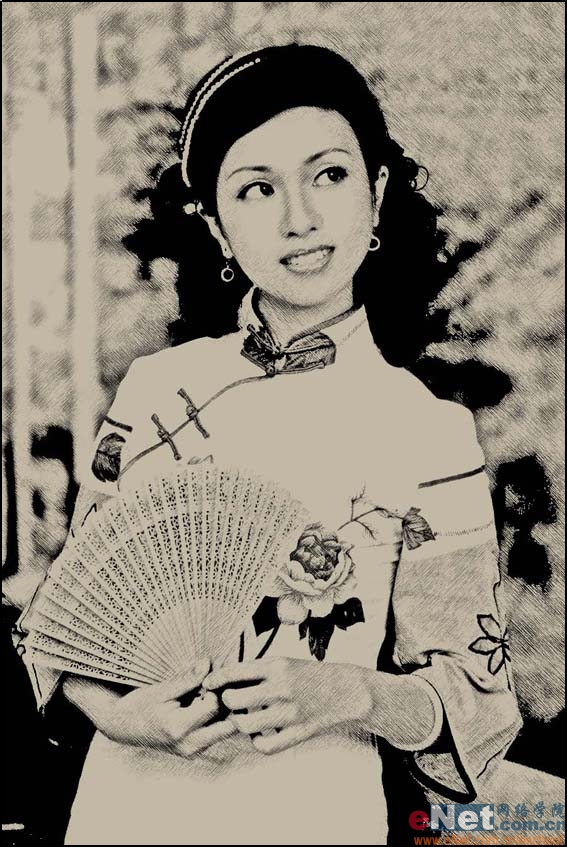
9、新建图层1,并将图层的混合模式设置为“正片叠底”模式,然后填充上黄灰色C25,M23,Y35,填充颜色后的素描画像如图12所示。
制作工具:Photoshop CS
制作过程:
1、打开一张照片如图01所示。
2、将“背景”层复制生成为“背景副本”层,然后选取菜单栏中的“图像”“调整”“去色”命令,将图像转换为相同颜色模式下的灰度图像,效果如图02所示。
3、按“Ctrl+L”键,弹出“色阶”对话框,参数设置如图03所示,调整后的画面效果如图04所示。
4、将“背景副本”层复制生成为“背景副本2”层,然后按“Ctrl+I”键,将当前画面反相显示,画面效果如图05所示。
5、选择菜单栏中的“滤镜”“模糊”“高斯模糊”命令,弹出“高斯模糊”对话框,参数设置如图06所示,画面效果如图07所示。
6、选择“滤镜”“杂色”“添加杂色”命令,弹出“添加杂色”对话框,参数设置如图08所示。
7、选择菜单栏中的“滤镜”“画笔描边”“成角的线条”命令,弹出“成角的线条”对话框,参数设置如图09所示,画面效果如图10所示。
8、将“背景副本2”的图层混合模式设置为“颜色减淡”模式,更改图层混合模式后的画面效果如图11所示。
9、新建图层1,并将图层的混合模式设置为“正片叠底”模式,然后填充上黄灰色C25,M23,Y35,填充颜色后的素描画像如图12所示。
推荐继续学习,上一篇ps教程:Photoshop鼠绘迪士尼卡通皮诺曹 下一篇ps教程:Photoshop面部美容秀MM完美肌肤
学习更多ps教程