Photoshop打造美女与石头墙的美
要点:石头墙
在外出旅游的时候,常常会选择一些很特别的地方拍摄照片,比如古朴的石头墙,现代美女与古老的墙相互衬托,给人一种返朴归真的感觉。下面我们就用Photoshop来制作这样一款石头墙。
制作工具:Photoshop CS
制作过程:
1、新建宽度为20厘米,高度为15厘米,分辨率为120像素,颜色模式为RGB颜色,背景为白色的文件。
2、按D键,将工具箱中的前景色和背景色设置为默认的黑色和白色,然后单击“通道”面板底部的按钮,新建“Alpha1”通道。
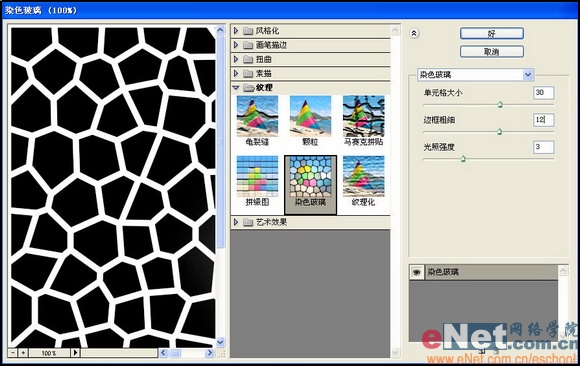
3、选择菜单栏中的“滤镜”“纹理”“染色玻璃”命令,弹出“染色玻璃”对话框,设置的参数及产生的效果如图01所示。
4、选择菜单栏中的“滤镜”“艺术效果”“木刻”命令,弹出“木刻”对话框,设置的参数及产生的效果如图02所示。

5、按住"Ctrl"键,单击"通道"面板中的"Alpha1"通道,将其作为选区载入。
6、按"Ctrl+~"键,返回到RGB颜色模式显示状态,然后在图层面板中新建图层1,并将其填充黑色。
7、按"Shift+Ctrl+I"键,将选择区域反选,然后新建图层2。
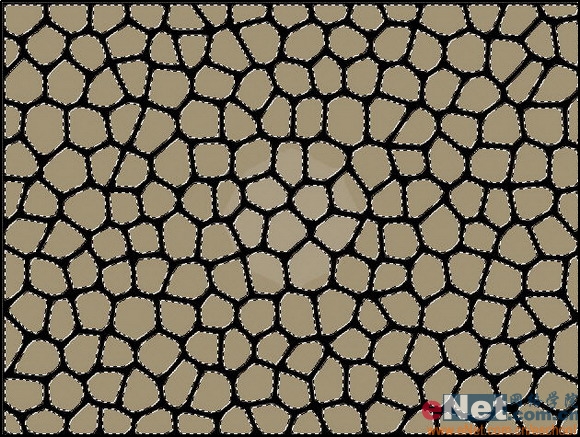
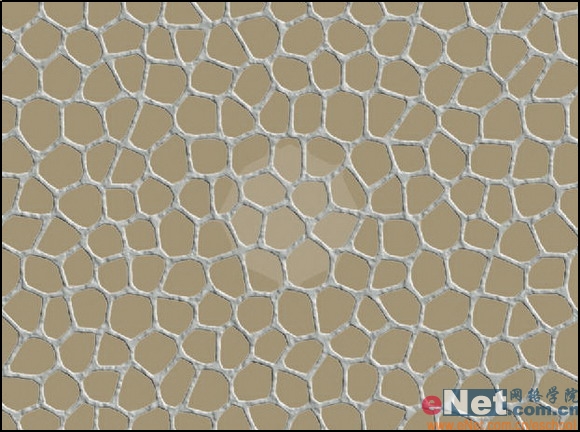
8、将工具箱中的前景色设置为灰褐色C40,M40,Y60,然后按"Alt+Backspace"键,为选择区域填充设置的前景色,填充颜色后的画面效果如图03所示。
9、按“Ctrl+D”键去除选择区域,然后将图层1设置为当前层。
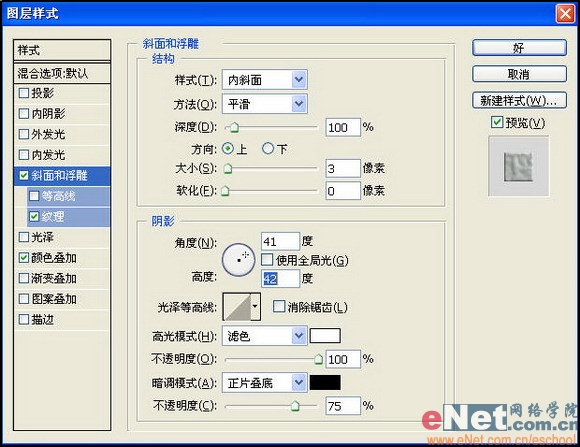
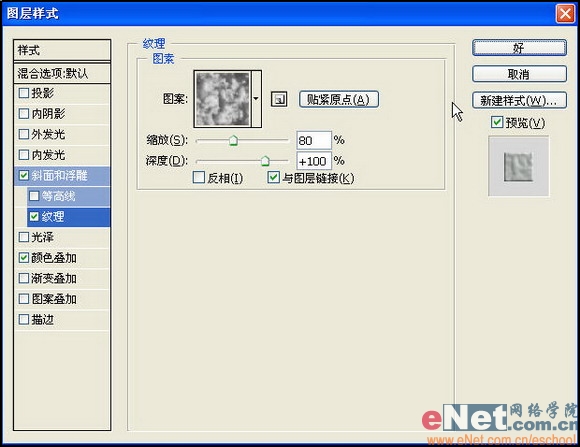
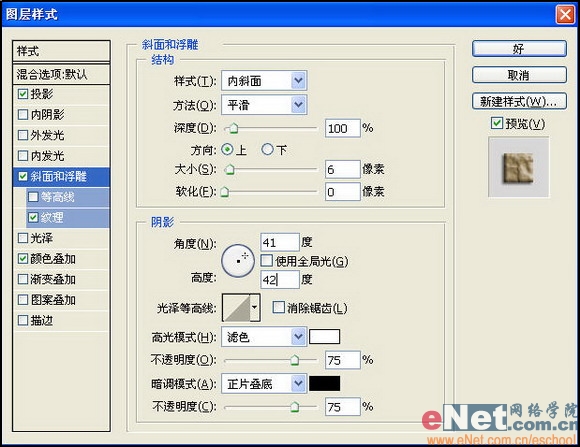
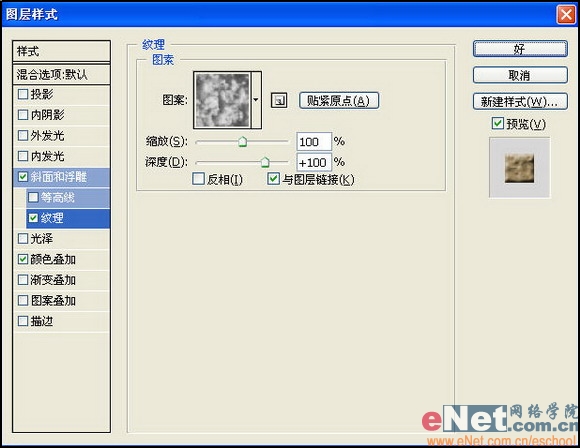
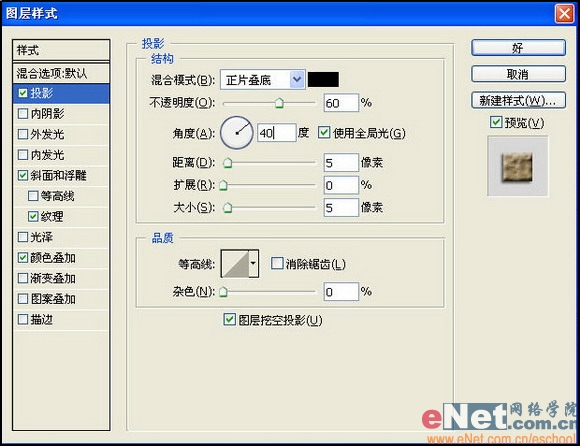
10、选择菜单栏中的“图层”“图层样式”“混合选项”命令,弹出“图层样式”对话框,设置的参数如图04-06所示,产生的效果如图07所示。
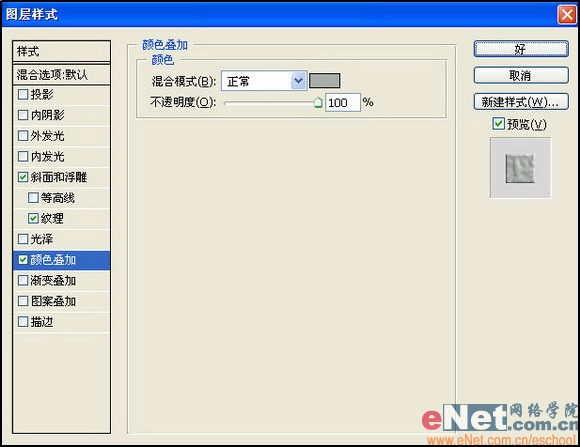
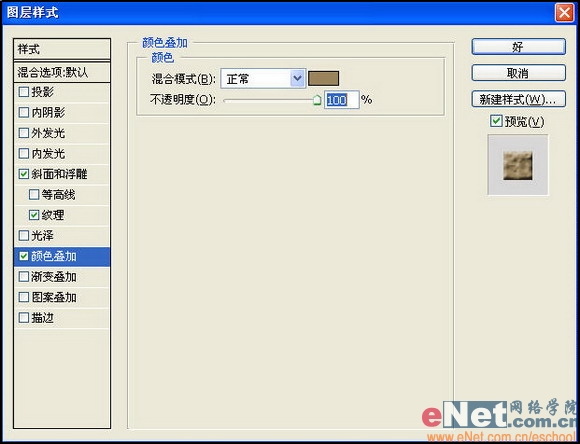
11、将图层2设置为当前层,选择菜单栏中的“图层”“图层样式”“混合选项”命令,弹出“图层样式”对话框,设置的参数如图08-11所示,产生的效果如图12所示。
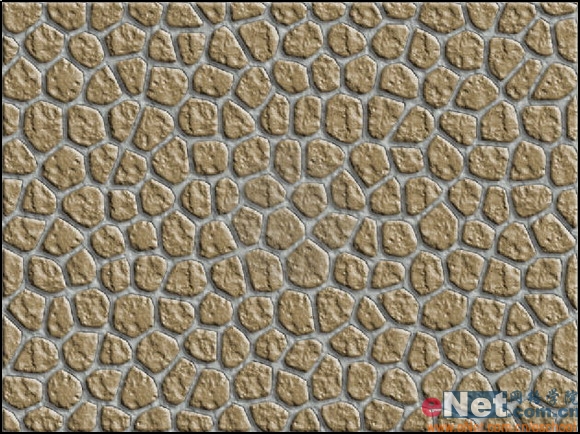
12、至此石头墙就做完了,可以用它作为照片的背景如图13所示。
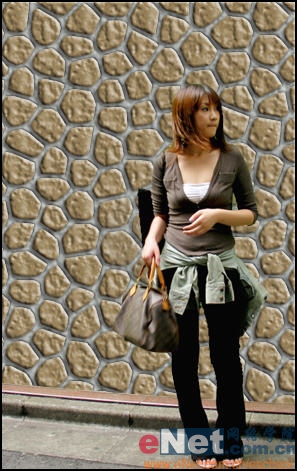
在外出旅游的时候,常常会选择一些很特别的地方拍摄照片,比如古朴的石头墙,现代美女与古老的墙相互衬托,给人一种返朴归真的感觉。下面我们就用Photoshop来制作这样一款石头墙。
制作工具:Photoshop CS
制作过程:
1、新建宽度为20厘米,高度为15厘米,分辨率为120像素,颜色模式为RGB颜色,背景为白色的文件。
2、按D键,将工具箱中的前景色和背景色设置为默认的黑色和白色,然后单击“通道”面板底部的按钮,新建“Alpha1”通道。
3、选择菜单栏中的“滤镜”“纹理”“染色玻璃”命令,弹出“染色玻璃”对话框,设置的参数及产生的效果如图01所示。
4、选择菜单栏中的“滤镜”“艺术效果”“木刻”命令,弹出“木刻”对话框,设置的参数及产生的效果如图02所示。
5、按住"Ctrl"键,单击"通道"面板中的"Alpha1"通道,将其作为选区载入。
6、按"Ctrl+~"键,返回到RGB颜色模式显示状态,然后在图层面板中新建图层1,并将其填充黑色。
7、按"Shift+Ctrl+I"键,将选择区域反选,然后新建图层2。
8、将工具箱中的前景色设置为灰褐色C40,M40,Y60,然后按"Alt+Backspace"键,为选择区域填充设置的前景色,填充颜色后的画面效果如图03所示。
9、按“Ctrl+D”键去除选择区域,然后将图层1设置为当前层。
10、选择菜单栏中的“图层”“图层样式”“混合选项”命令,弹出“图层样式”对话框,设置的参数如图04-06所示,产生的效果如图07所示。
11、将图层2设置为当前层,选择菜单栏中的“图层”“图层样式”“混合选项”命令,弹出“图层样式”对话框,设置的参数如图08-11所示,产生的效果如图12所示。
12、至此石头墙就做完了,可以用它作为照片的背景如图13所示。
推荐继续学习,上一篇ps教程:用Photoshop教你打造爆炸的飞机 下一篇ps教程:教你用Photoshop打造奶酪店招牌
学习更多ps教程