用Photoshop教你鼠绘精美电吉他
要点:鼠绘精美电吉
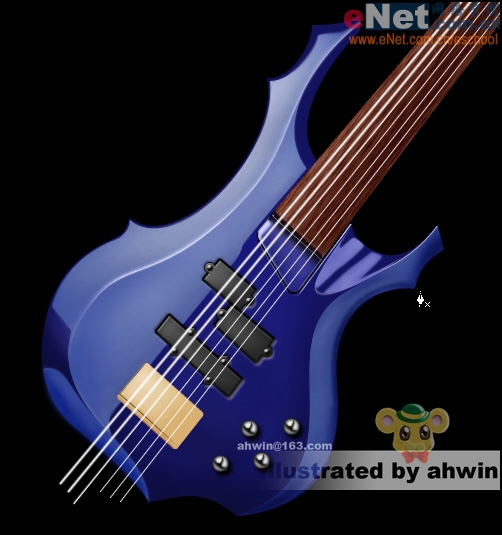
先看效果:

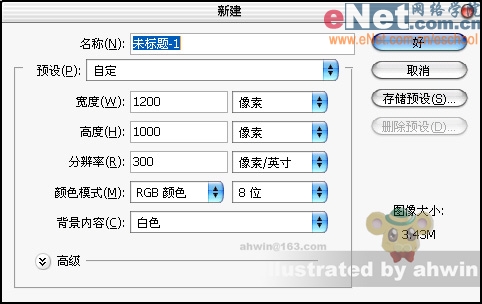
1)第一步,启动我们心爱的软件photoshop,新建文件,参数如图01所示,为了可以将细微的地方表现的更真实,建立一个比较大一点的图片还是很有必要的。
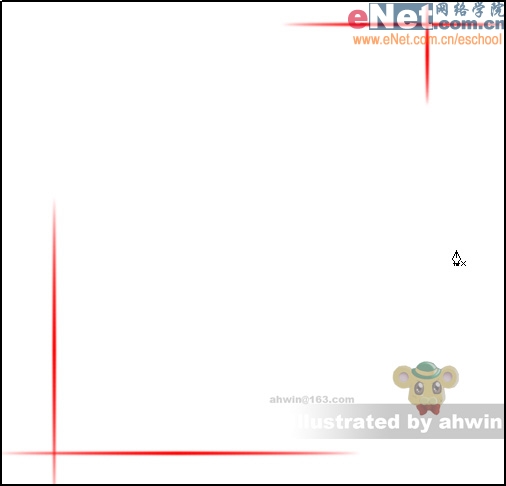
2)第二步,在图中可以看出我是用红色线条将所画的吉他的大体位置画了出来,我们一会儿要画出来的吉他就被框在这个红色范围之内(如图02)
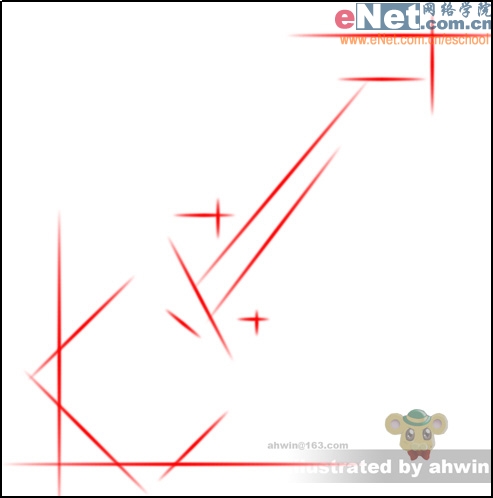
3)第三步,如图03所示,在红线范围之内继续使用红线条将吉他的大致轮廓勾画出来,尽量做到准确,如果实在不够准确也没有关系。:)
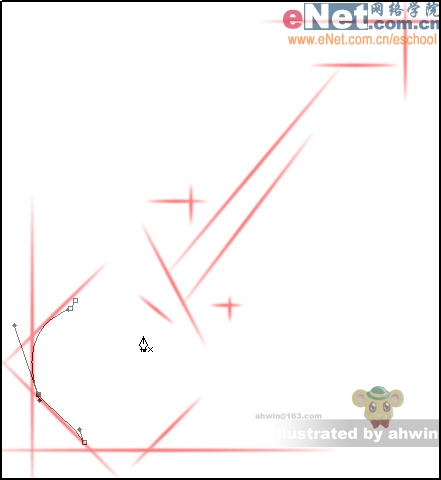
4)第四步,现在就开始进入正式的鼠绘了,选择我们再熟悉不过的钢笔工具,根据先前起的红色线条稿子来勾画。这里我将红线的土层降低了透明度具体数值可以根据自己个人的喜好。钢笔的使用在很多书中或者网上的文章中都有介绍,不太了解的朋友们可以去补习一下,其实很简单就是结合ctrl和alt来进行勾画。(如图04所示)
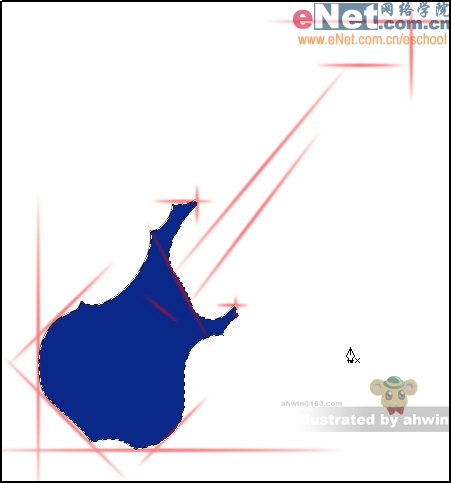
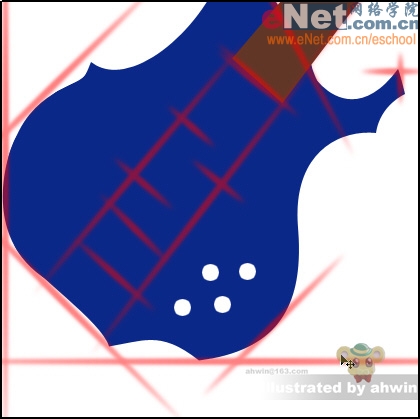
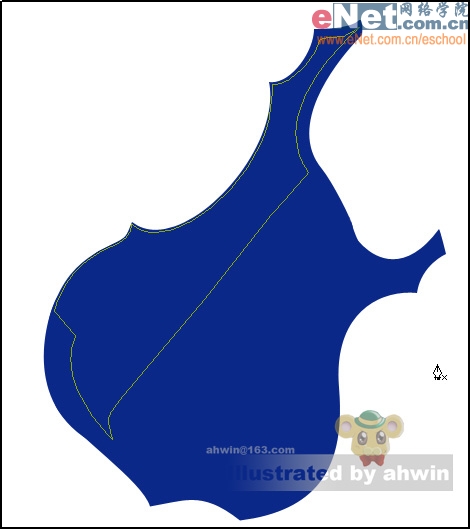
5)第五步,用钢笔勾出一个吉他主面板的封闭路径,然后将它转化为选取,并将它填充为我们喜欢的颜色,这里我填充为蓝色。(如图05所示)
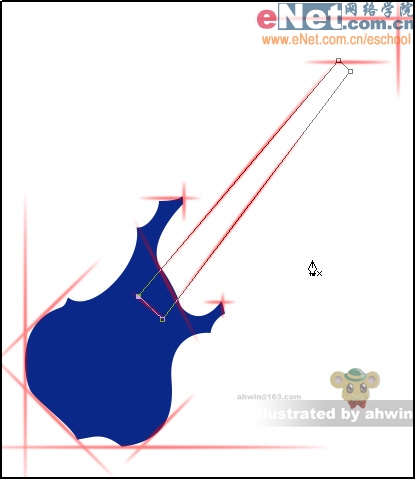
6)第六步,如图06所示,使用钢笔工具勾出一个长梯形,用术语叫“琴颈”。
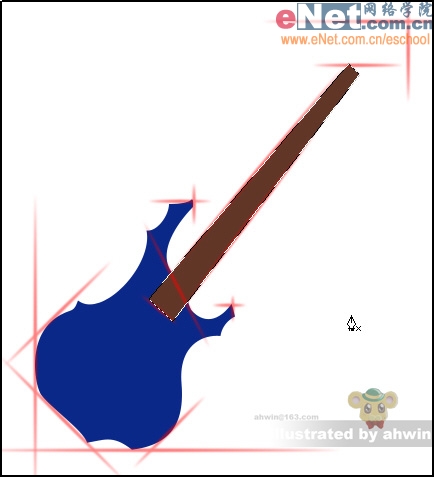
7)第七步,一样的办法,将路径转化为选区并填充颜色,这里我想让它拥有木纹效果所以填充为近似于木头的颜色。(如图07所示)
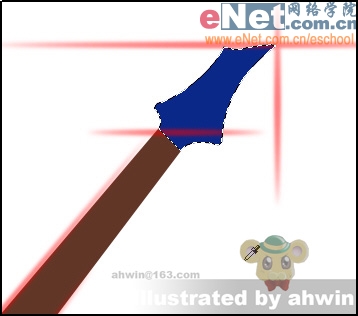
8)第八步,同样的办法画出琴头,填充跟琴身同样的颜色。(如图08所示)
9)第九步,吉他的主要就这三块,现在开始画琴身的一些部分。先确定大体位置,使用红色线条打出琴身面板上的各个部件的位置。(如图09所示)
10)第十步,使用巨型选区工具建立一个矩形选区。(如图10所示)
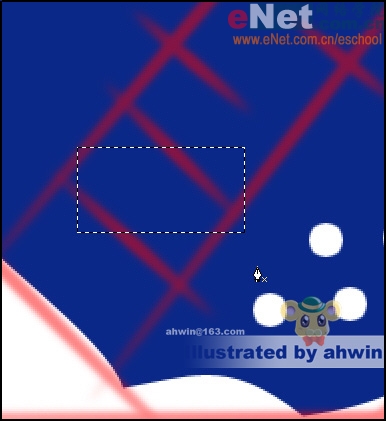
11)第十一步,在菜单栏选择“选择/变换选区”(如图11所示)
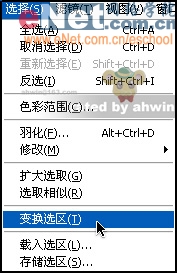
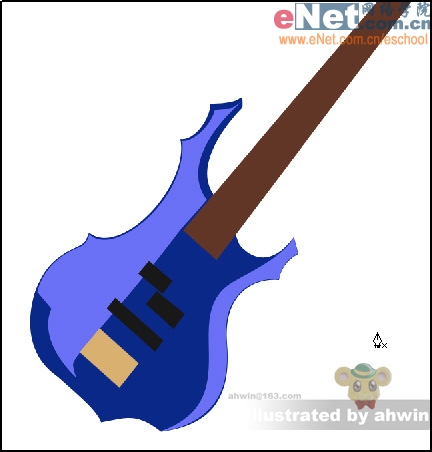
12)第十二步,将选区位置调整好并且填充,同样的方法做出其他几个色块。(如图12所示)
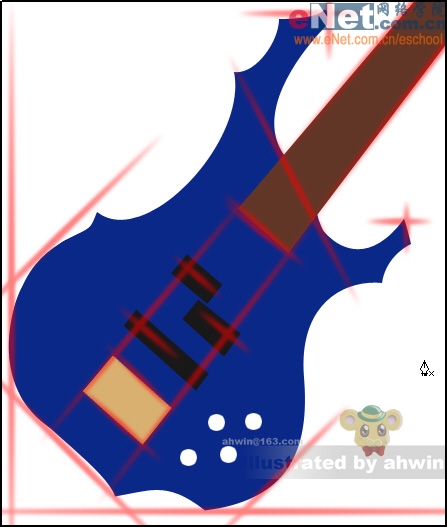
13)第十三步,将其它无关的图层部分隐藏,只留下琴身的图层,使用钢笔工具勾画出亮部的路径。明暗的对比才能更好的表现立体感。(如图13所示)
14)第十四部,勾出吉他的几个亮面并填充一个合适的颜色。(如图14所示)
15)第十五步,继续勾出吉他的亮部选区并填充。(如图15所示)

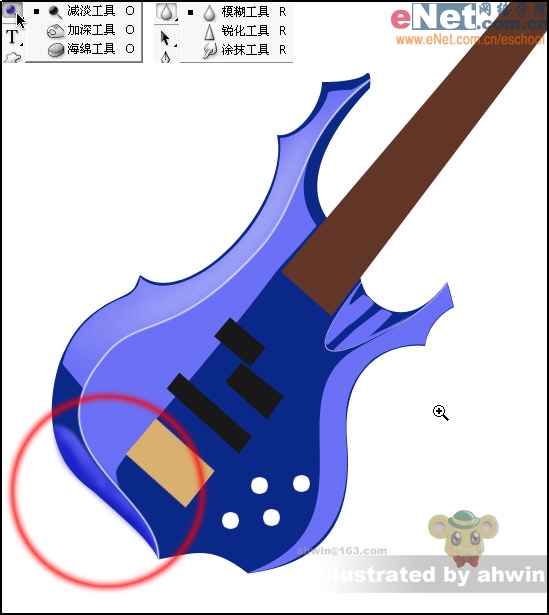
16)第十六步,使用加深工具和减淡工具以及模糊工具对吉他面板的亮部进行修饰,表现出它的明暗光泽。需要注意的是使用加深工具和减淡工具的时候需要将曝光度调到比较低的位置上,比如5%——10%;选择一个硬度比较低的笔刷。(如图16所示)
17)第十七步,使用模糊工具处理一些边缘。(如图十七所示)
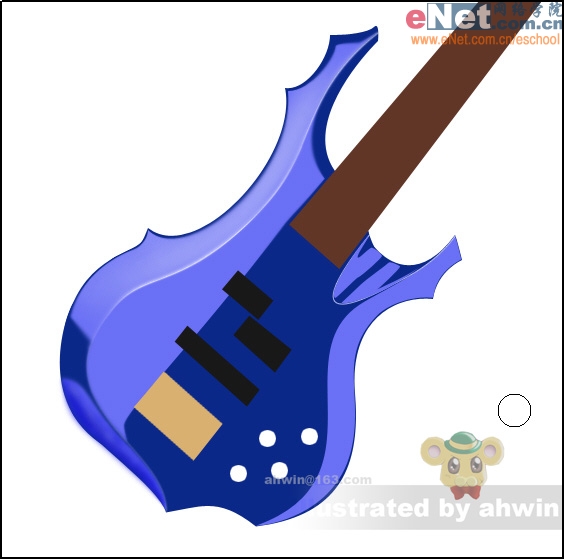
18)第十八步,继续使用加深工具和减淡工具对吉他面板的暗部进行修饰,表现出它的明暗光泽。最后使用模糊工具进行模糊处理。(如图十八所示)

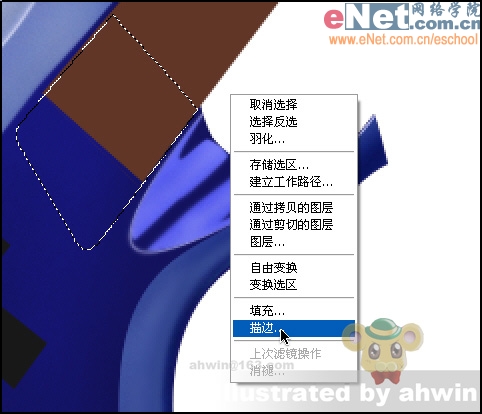
19)第十九步,使用钢笔工具画出封闭路径并建立选区(如图19所示)点击鼠标右键选择“描边”
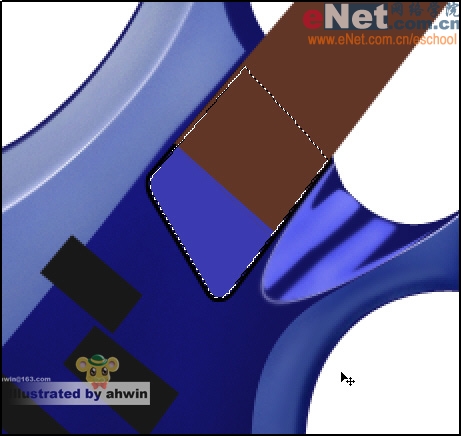
20)第二十步,描边为近似于黑色的深色,然后选择菜单“选择/修改/收缩”收缩选区适当像素并填充为淡蓝色。(如图20所示)
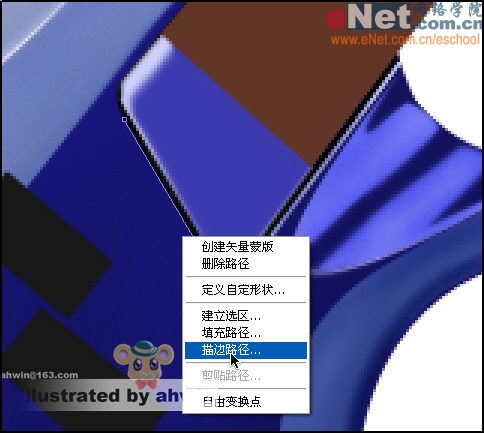
21)第二十一步,如图21所示使用钢笔工具勾选出路径,右键单击鼠标选择描边路径。然后选择加深工具和减淡工具进行调整。将明暗表现出来。
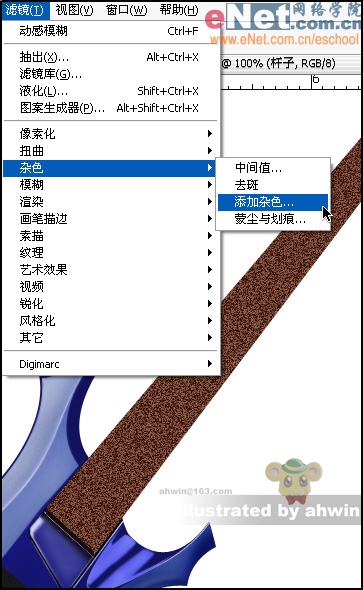
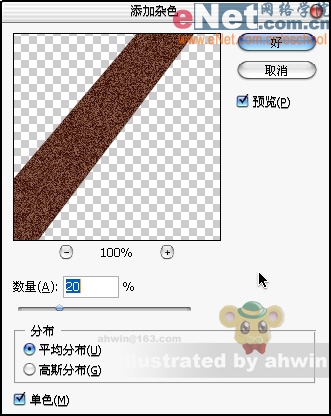
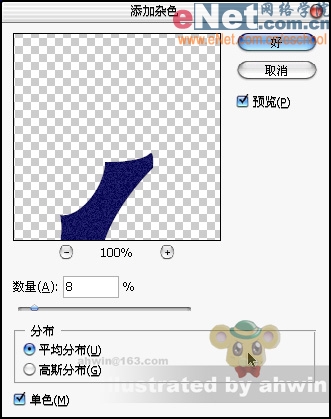
22)第二十二步,琴颈,我一开始就说要让它由木纹来表现,很容易,在菜单栏选择“滤镜/杂色/添加杂色”。(如图22所示)
23)第二十三步,添加杂色详细参数如图23所示,数量:20%,分布为平均分布,并在“单色”上打勾。
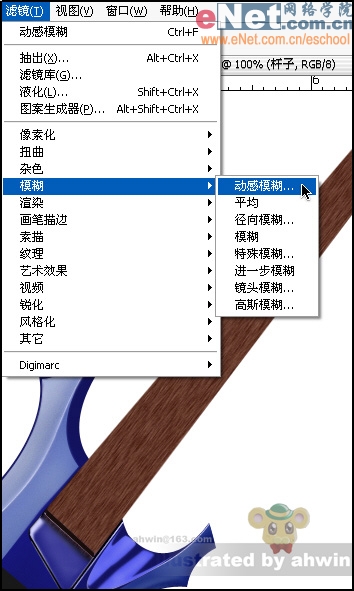
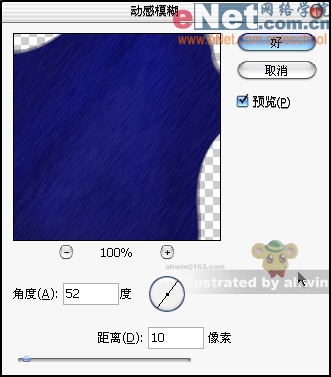
24)第二十四步,依然是使用滤镜,滤镜可以帮之我们制造出许多意想不到的特殊效果。选择“滤镜/模糊/动感模糊”。(如图24所示)
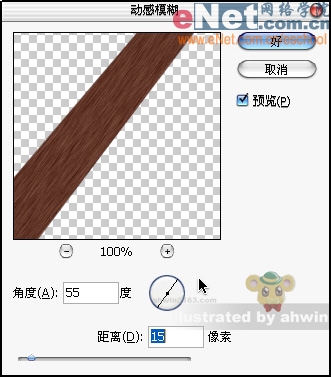
25)第二十五步,参数设置如图25所示。角度为55度,距离为15像素。具体情况具体对待,不是死的。
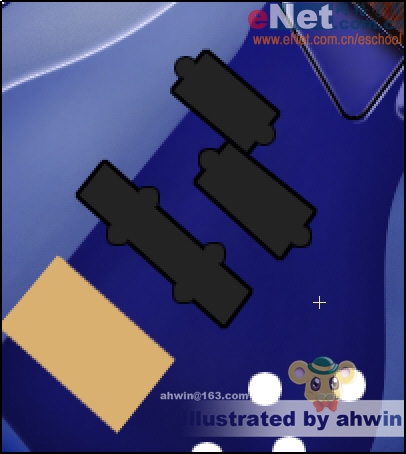
26)第二十六步,现在开始做琴身中央的三个黑色的长方块,如图26所示,这里我使用了两个土层,下面为近似黑色上边为中度灰色。
27)第二十七步,给上边的图层使用图层样式特效,在图层面板中双击该图层名称后面的地方即可探出图层样式对话框。参数设置如图27所示。
28)第二十八步,紧接着给下边的图层使用图层样式特效。同样的方法打开图层样式调板,参数如图28所示。
29)第二十九步,使用加深工具减淡工具对其进行明暗的表现。再调整一下琴身的明暗。(如图29所示)
30)第三十步,画出四个小球的大致明暗关系,并使用图层样式来进行调整。参数设置如图30所示。
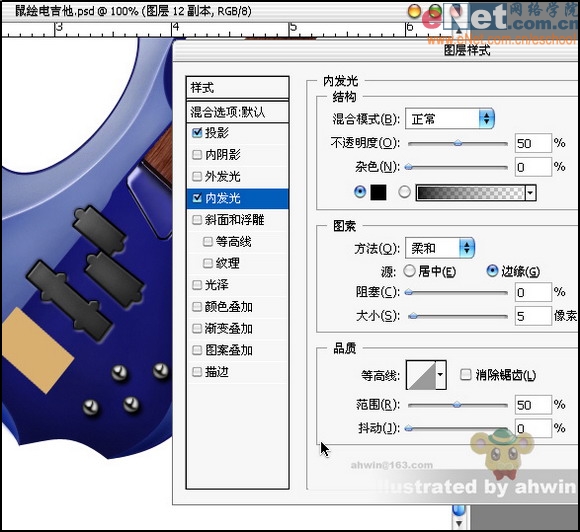
31)第三十一步,内发光的参数设置(如图31所示)
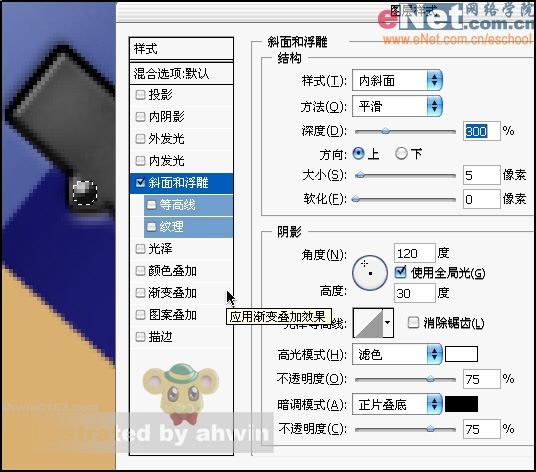
32)第三十二步,使用椭圆选区工具建立圆形选区填充颜色并使用图层样式,参数设置如图32所示,只使用了斜面和浮雕效果。
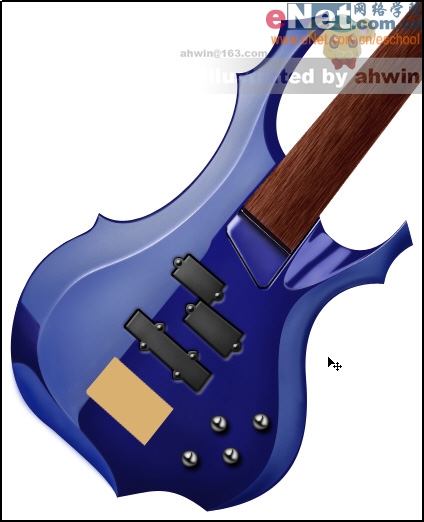
33)第三十三步,啊,进行到这里不容易啊。。。休息一下喘口气看看效果怎么样(如图33所示)
34)第三十四步,吉他还有个名字是“六弦琴”,这说明什么呢?这说明它有六根弦(废话!)现在是画这六根弦的时候了。按p键选择我们的钢笔工具画出一根直线路径,并按住ctrl+alt将其复制为六根,不过还是需要进行一些小小的调整的。(如图34所示)
35)第三十五步,为了更好的突出这六根弦我暂时先将背景填充为黑色,将六根路径描边,需要注意的是吉他的六根弦并不是一般粗,从左至右是由粗到细的。可不能闹了笑话。(如图35所示)
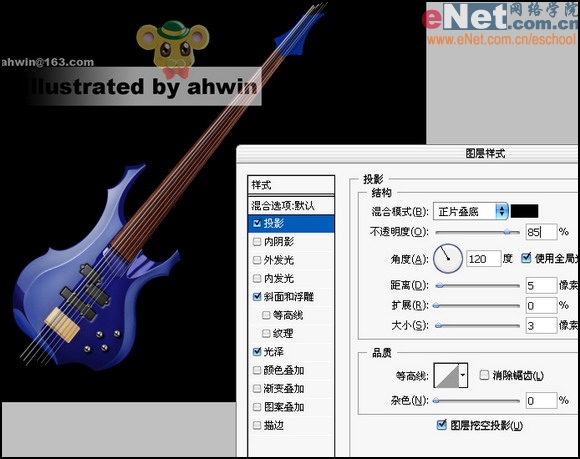
36)第三十六步,对这六根弦使用土层样式进行特殊修饰,投影的参数设置如图36所示
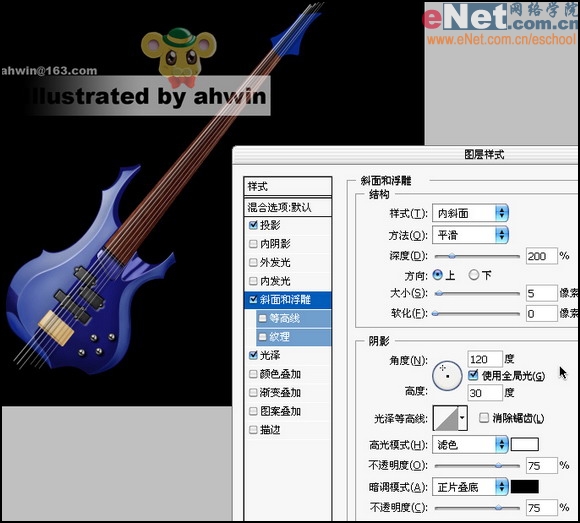
37)第三十七步,斜面和浮雕的设置参数,让弦看上去有立体感。(如图三十七所示)
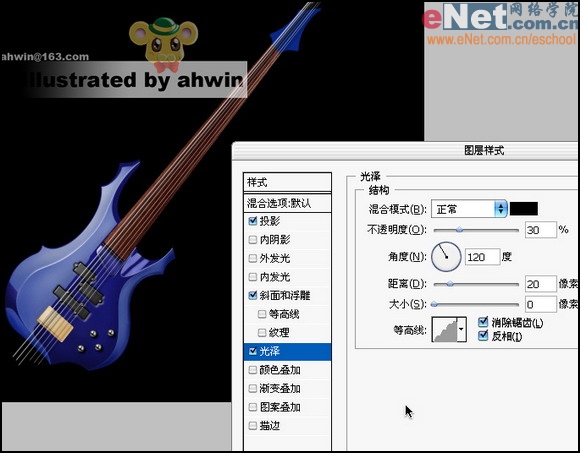
38)第三十八步,光泽的设置参数,让弦也有明暗对比。(如图三十八所示)
39)第三十九步,我所绘制的这把吉他有二十四个品位,使用钢笔工具画出一条直线路径并复制二十三条,一次排开(如图39所示)。
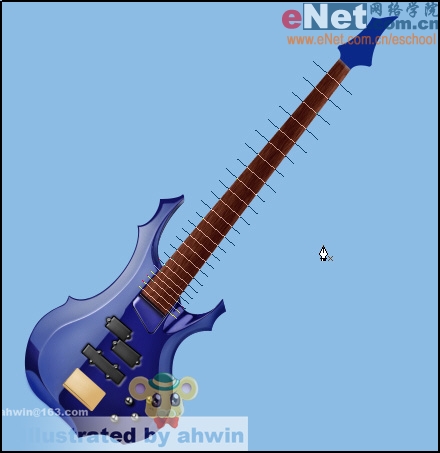
40)第四十步,描边路径,并将多余的部分擦除。如图四十所示。
41)第四十一步,对这二十四根线条进行图层样式的特殊修饰。投影设置参数如图41所示。

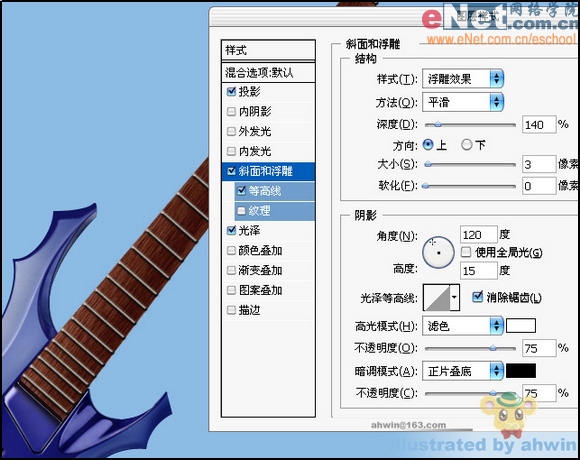
42)第四十二步,斜面和浮雕的参数设置。(如图42所示)
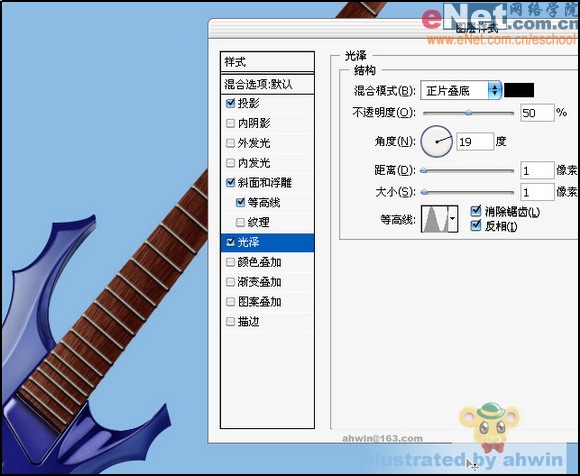
43)第四十三步,光泽的参数设置。(如图43所示)
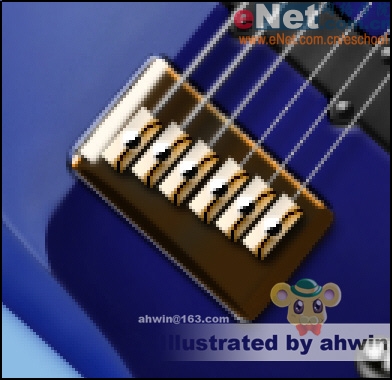
44)第四十四步,绘制吉他的琴桥,这里其实没什么好说的,变化明显的就直接画出来,明暗依然是使用加深工具和减淡工具进行调整。在此基础上加入图层样式也是不错的选择。(如图44所示)
45)第四十五步,绘制琴头固定六根弦的地方。这里我使用了图层样式,绘制的效果并不是很理想。琴头的立体感也是需要绘制它的几个面来体现的。(如图45所示)
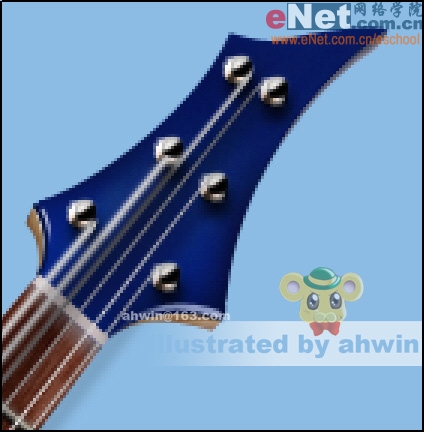
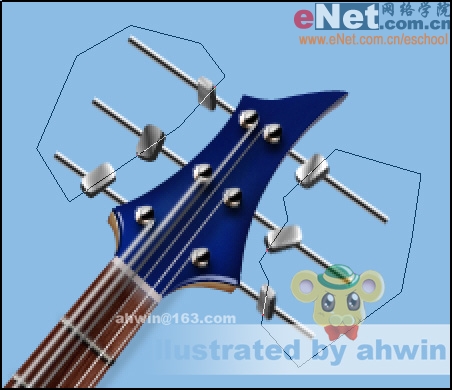
46)第四十六步,绘制出六个上弦的把手,这里我偷了一下懒只画了左边三个,右边三个是复制过来然后调整了方向的效果。(如图46所示)
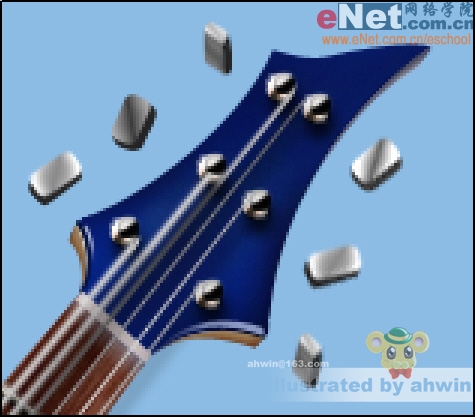
47)第四十七步,使用渐变工具填充三根细长的矩形选区,使其看上去有金属的质感。(如图47所示)
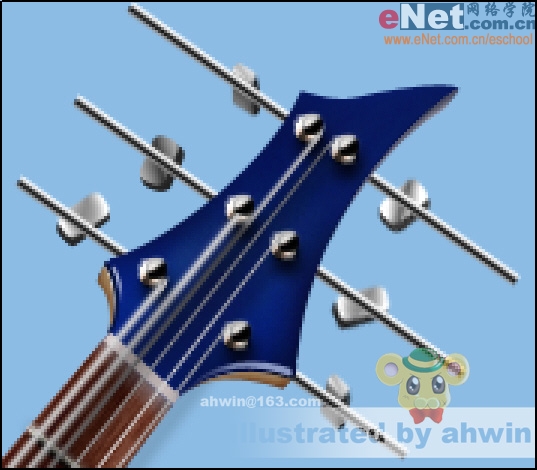
48)第四十八步,将金属条图层位于琴头和把手的后边,用钢笔勾出多余的部分并删除。(如图48所示)
49)第四十九步,给整个吉他的主要部分添加杂色,参数设置如图49所示。
50)第五十步,紧接着使用动感模糊处理刚才添加杂色的区域,参数设置如图50所示。
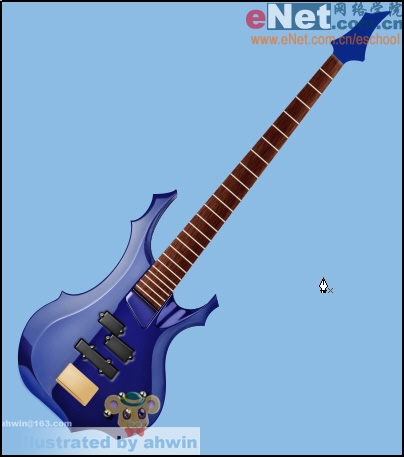
51)第五十一步,处理后将更加有质感更加逼真。(如图51所示)
52)第五十二步,再次处理一些细节比如挂背带的地方。(如图52所示)
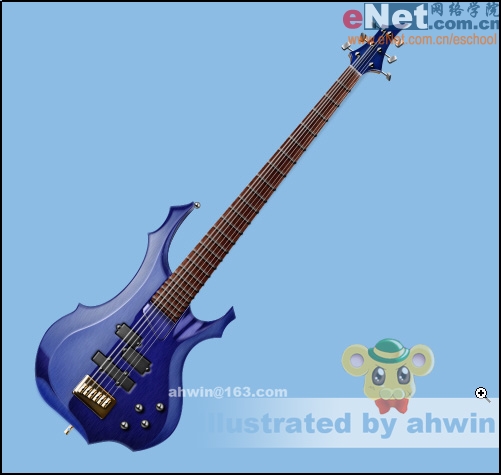
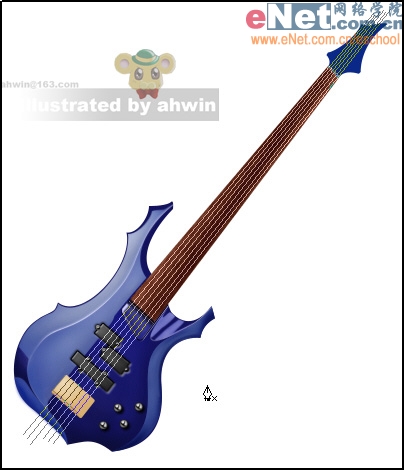
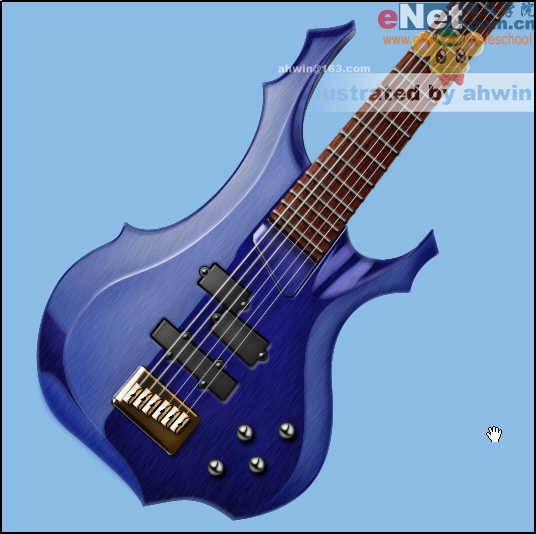
53)完成图,按shift+ctrl+alt+e将所有可见图层合并在一个图层(注意先要把背景层隐藏),将吉他放大并调整其位置降低透明度(如图完成图所示),使用自定义形状工具添加一些音符和一只蝴蝶。OK!大功告成了!谢谢观赏!下回再见!
先看效果:
1)第一步,启动我们心爱的软件photoshop,新建文件,参数如图01所示,为了可以将细微的地方表现的更真实,建立一个比较大一点的图片还是很有必要的。
2)第二步,在图中可以看出我是用红色线条将所画的吉他的大体位置画了出来,我们一会儿要画出来的吉他就被框在这个红色范围之内(如图02)
3)第三步,如图03所示,在红线范围之内继续使用红线条将吉他的大致轮廓勾画出来,尽量做到准确,如果实在不够准确也没有关系。:)
4)第四步,现在就开始进入正式的鼠绘了,选择我们再熟悉不过的钢笔工具,根据先前起的红色线条稿子来勾画。这里我将红线的土层降低了透明度具体数值可以根据自己个人的喜好。钢笔的使用在很多书中或者网上的文章中都有介绍,不太了解的朋友们可以去补习一下,其实很简单就是结合ctrl和alt来进行勾画。(如图04所示)
5)第五步,用钢笔勾出一个吉他主面板的封闭路径,然后将它转化为选取,并将它填充为我们喜欢的颜色,这里我填充为蓝色。(如图05所示)
6)第六步,如图06所示,使用钢笔工具勾出一个长梯形,用术语叫“琴颈”。
7)第七步,一样的办法,将路径转化为选区并填充颜色,这里我想让它拥有木纹效果所以填充为近似于木头的颜色。(如图07所示)
8)第八步,同样的办法画出琴头,填充跟琴身同样的颜色。(如图08所示)
9)第九步,吉他的主要就这三块,现在开始画琴身的一些部分。先确定大体位置,使用红色线条打出琴身面板上的各个部件的位置。(如图09所示)
10)第十步,使用巨型选区工具建立一个矩形选区。(如图10所示)
11)第十一步,在菜单栏选择“选择/变换选区”(如图11所示)
12)第十二步,将选区位置调整好并且填充,同样的方法做出其他几个色块。(如图12所示)
13)第十三步,将其它无关的图层部分隐藏,只留下琴身的图层,使用钢笔工具勾画出亮部的路径。明暗的对比才能更好的表现立体感。(如图13所示)
14)第十四部,勾出吉他的几个亮面并填充一个合适的颜色。(如图14所示)
15)第十五步,继续勾出吉他的亮部选区并填充。(如图15所示)
16)第十六步,使用加深工具和减淡工具以及模糊工具对吉他面板的亮部进行修饰,表现出它的明暗光泽。需要注意的是使用加深工具和减淡工具的时候需要将曝光度调到比较低的位置上,比如5%——10%;选择一个硬度比较低的笔刷。(如图16所示)
17)第十七步,使用模糊工具处理一些边缘。(如图十七所示)
18)第十八步,继续使用加深工具和减淡工具对吉他面板的暗部进行修饰,表现出它的明暗光泽。最后使用模糊工具进行模糊处理。(如图十八所示)
19)第十九步,使用钢笔工具画出封闭路径并建立选区(如图19所示)点击鼠标右键选择“描边”
20)第二十步,描边为近似于黑色的深色,然后选择菜单“选择/修改/收缩”收缩选区适当像素并填充为淡蓝色。(如图20所示)
21)第二十一步,如图21所示使用钢笔工具勾选出路径,右键单击鼠标选择描边路径。然后选择加深工具和减淡工具进行调整。将明暗表现出来。
22)第二十二步,琴颈,我一开始就说要让它由木纹来表现,很容易,在菜单栏选择“滤镜/杂色/添加杂色”。(如图22所示)
23)第二十三步,添加杂色详细参数如图23所示,数量:20%,分布为平均分布,并在“单色”上打勾。
24)第二十四步,依然是使用滤镜,滤镜可以帮之我们制造出许多意想不到的特殊效果。选择“滤镜/模糊/动感模糊”。(如图24所示)
25)第二十五步,参数设置如图25所示。角度为55度,距离为15像素。具体情况具体对待,不是死的。
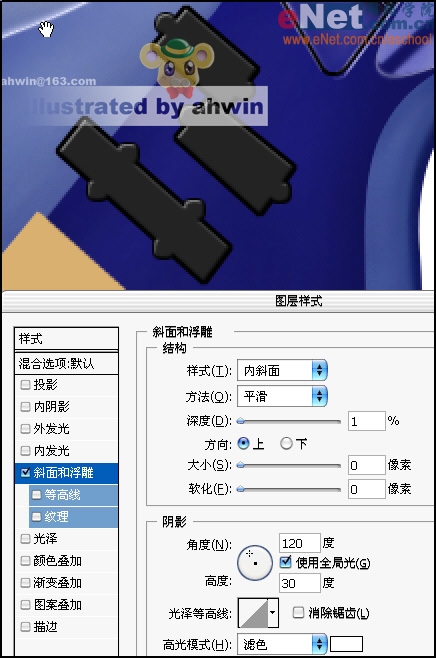
26)第二十六步,现在开始做琴身中央的三个黑色的长方块,如图26所示,这里我使用了两个土层,下面为近似黑色上边为中度灰色。
27)第二十七步,给上边的图层使用图层样式特效,在图层面板中双击该图层名称后面的地方即可探出图层样式对话框。参数设置如图27所示。
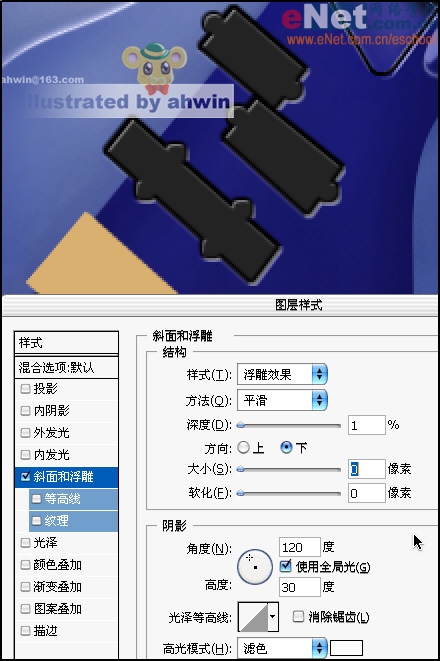
28)第二十八步,紧接着给下边的图层使用图层样式特效。同样的方法打开图层样式调板,参数如图28所示。
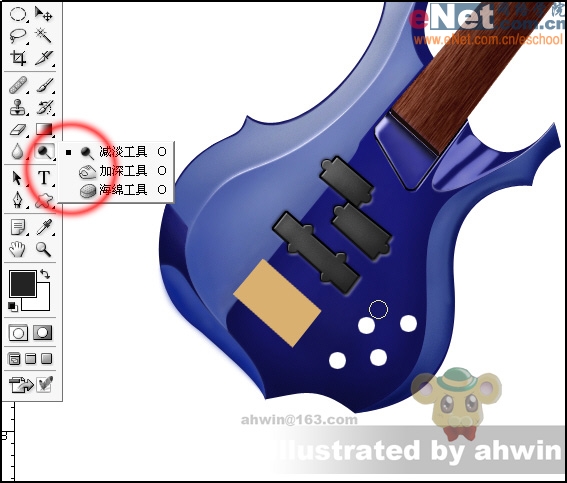
29)第二十九步,使用加深工具减淡工具对其进行明暗的表现。再调整一下琴身的明暗。(如图29所示)
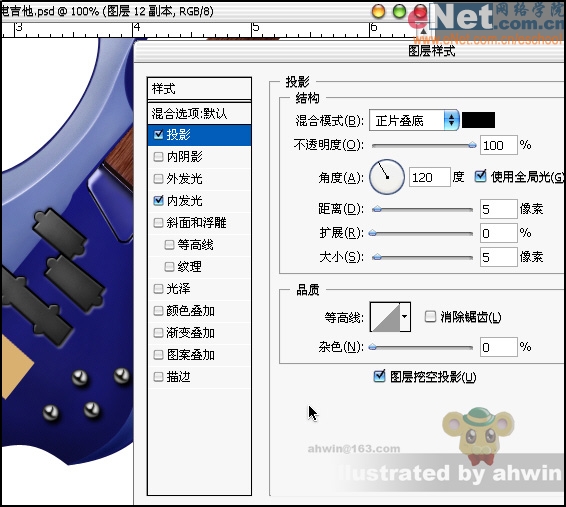
30)第三十步,画出四个小球的大致明暗关系,并使用图层样式来进行调整。参数设置如图30所示。
31)第三十一步,内发光的参数设置(如图31所示)
32)第三十二步,使用椭圆选区工具建立圆形选区填充颜色并使用图层样式,参数设置如图32所示,只使用了斜面和浮雕效果。
33)第三十三步,啊,进行到这里不容易啊。。。休息一下喘口气看看效果怎么样(如图33所示)
34)第三十四步,吉他还有个名字是“六弦琴”,这说明什么呢?这说明它有六根弦(废话!)现在是画这六根弦的时候了。按p键选择我们的钢笔工具画出一根直线路径,并按住ctrl+alt将其复制为六根,不过还是需要进行一些小小的调整的。(如图34所示)
35)第三十五步,为了更好的突出这六根弦我暂时先将背景填充为黑色,将六根路径描边,需要注意的是吉他的六根弦并不是一般粗,从左至右是由粗到细的。可不能闹了笑话。(如图35所示)
36)第三十六步,对这六根弦使用土层样式进行特殊修饰,投影的参数设置如图36所示
37)第三十七步,斜面和浮雕的设置参数,让弦看上去有立体感。(如图三十七所示)
38)第三十八步,光泽的设置参数,让弦也有明暗对比。(如图三十八所示)
39)第三十九步,我所绘制的这把吉他有二十四个品位,使用钢笔工具画出一条直线路径并复制二十三条,一次排开(如图39所示)。
40)第四十步,描边路径,并将多余的部分擦除。如图四十所示。
41)第四十一步,对这二十四根线条进行图层样式的特殊修饰。投影设置参数如图41所示。
42)第四十二步,斜面和浮雕的参数设置。(如图42所示)
43)第四十三步,光泽的参数设置。(如图43所示)
44)第四十四步,绘制吉他的琴桥,这里其实没什么好说的,变化明显的就直接画出来,明暗依然是使用加深工具和减淡工具进行调整。在此基础上加入图层样式也是不错的选择。(如图44所示)
45)第四十五步,绘制琴头固定六根弦的地方。这里我使用了图层样式,绘制的效果并不是很理想。琴头的立体感也是需要绘制它的几个面来体现的。(如图45所示)
46)第四十六步,绘制出六个上弦的把手,这里我偷了一下懒只画了左边三个,右边三个是复制过来然后调整了方向的效果。(如图46所示)
47)第四十七步,使用渐变工具填充三根细长的矩形选区,使其看上去有金属的质感。(如图47所示)
48)第四十八步,将金属条图层位于琴头和把手的后边,用钢笔勾出多余的部分并删除。(如图48所示)
49)第四十九步,给整个吉他的主要部分添加杂色,参数设置如图49所示。
50)第五十步,紧接着使用动感模糊处理刚才添加杂色的区域,参数设置如图50所示。
51)第五十一步,处理后将更加有质感更加逼真。(如图51所示)
52)第五十二步,再次处理一些细节比如挂背带的地方。(如图52所示)
53)完成图,按shift+ctrl+alt+e将所有可见图层合并在一个图层(注意先要把背景层隐藏),将吉他放大并调整其位置降低透明度(如图完成图所示),使用自定义形状工具添加一些音符和一只蝴蝶。OK!大功告成了!谢谢观赏!下回再见!
推荐继续学习,上一篇ps教程:Photoshop打造超酷贝克汉姆桌面 下一篇ps教程:Photoshop快速打造超女周笔畅
学习更多ps教程