用Photoshop超强插件给MM抠图
要点:
没有此插件的朋友请去http://www.xg098.com/Soft/Soft_1817.htm下载
强大的扣图软件KnockOut 1.5,大家已经很熟悉了.现在KnockOut 2.0已经发布,并且作为photoshop的内部插件,下面我来介绍一下KnockOut 2.0的基本操作,对于用ps扣图有疑惑的朋友可以考虑使用这个滤镜.
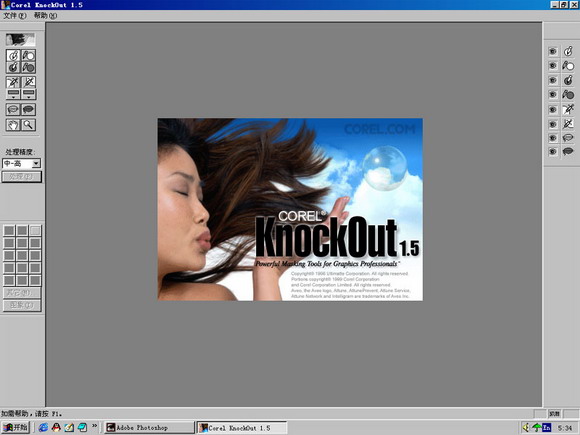
这是Croel KnockOut 1.5的界面,当时他还是作为一个独立的软件.
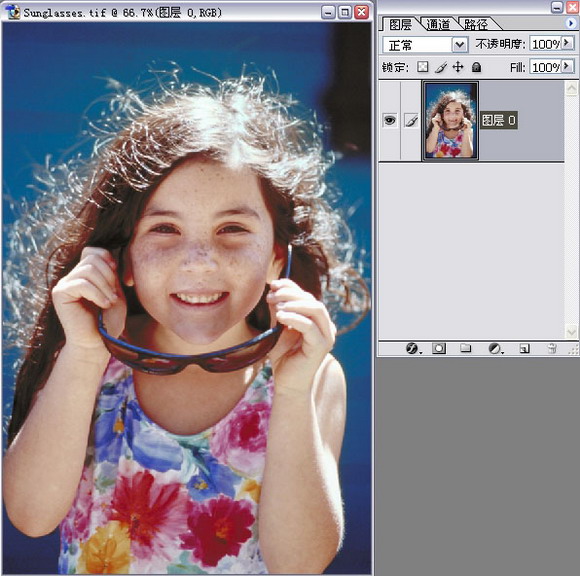
首先打开一张图象,双击背景层,转换为图层0.
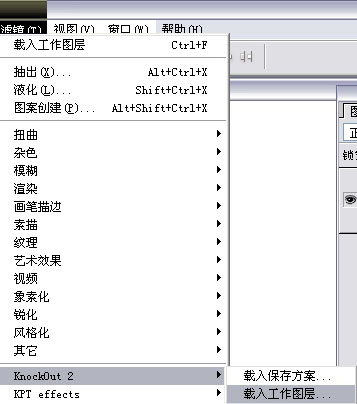
滤镜-------KnockOut----------载入工作图层(这时photoshop会自动关闭,并开启KnockOut 2.0)
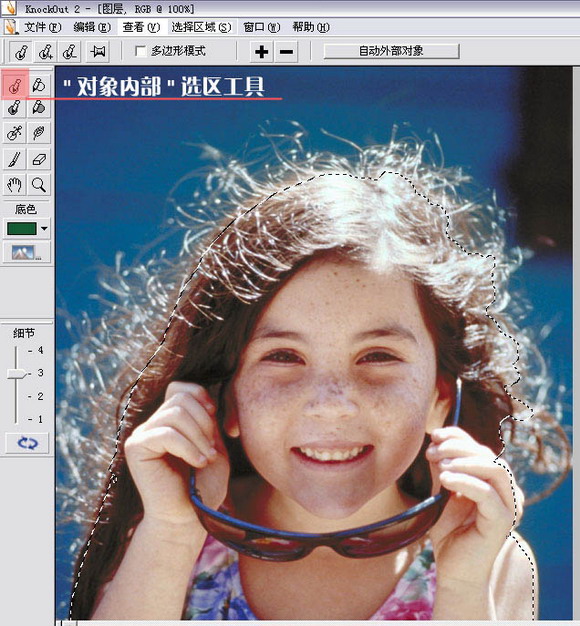
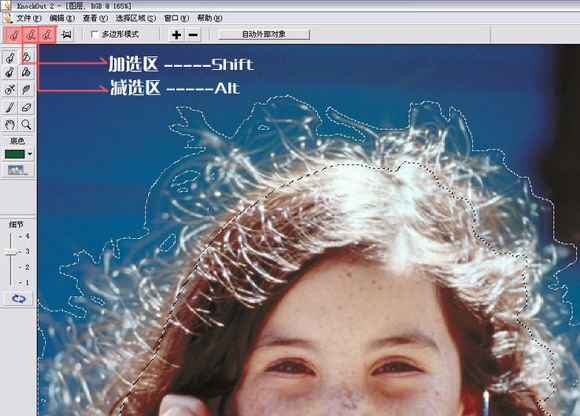
用 对象内部 工具画出如图的选区,注意不要画到毛发的边缘上.可以留有适当的距离(shift---加选区 Alt-----减选区).
用 对象外部 工具画出头发外部的选区,这一步要细一些.(shift---加选区 Alt-----减选区).
说明:对象内部 工具画出的选区表明保留部分,对象外部 工具画出的选区外部为删除部分,两个选区之间部分就是图象的边缘.(个人理解)
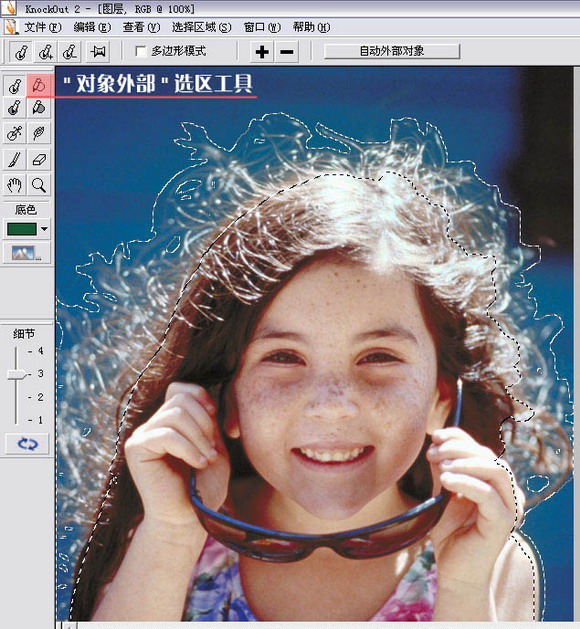
细调.(调节不同的选区要用不同的工具)
单击下面的"处理"按钮,进行扣图预览,并且可以指定不同的背景色.
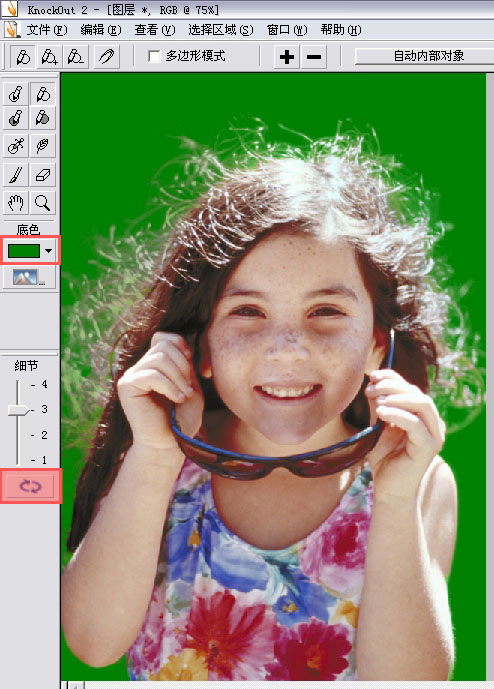
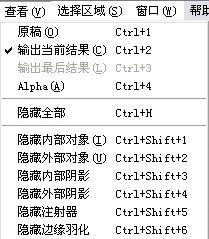
如果发现问题可以用Ctrl+1回到原稿,进行修改.
为了更好的观察,也可以在背景上放置一张位图(如图)
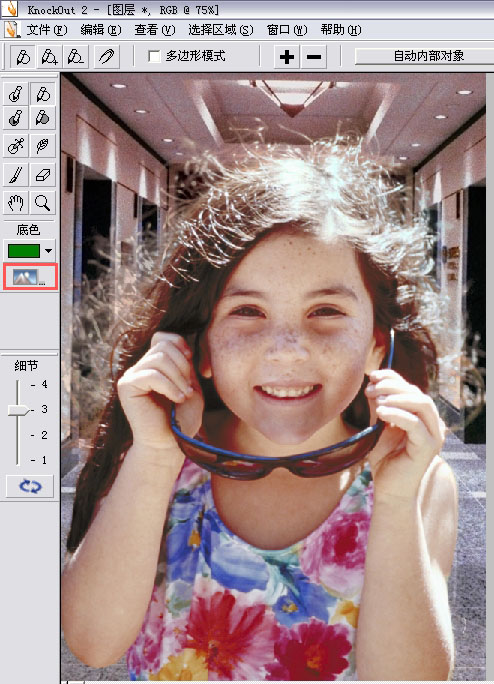
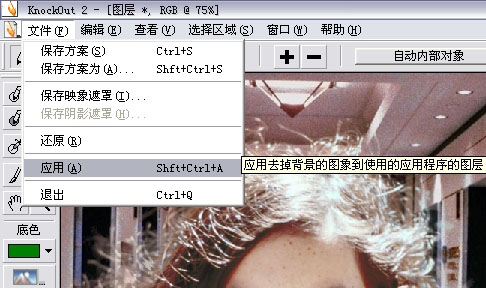
确认没有问题,选择"应用"------回到photoshop
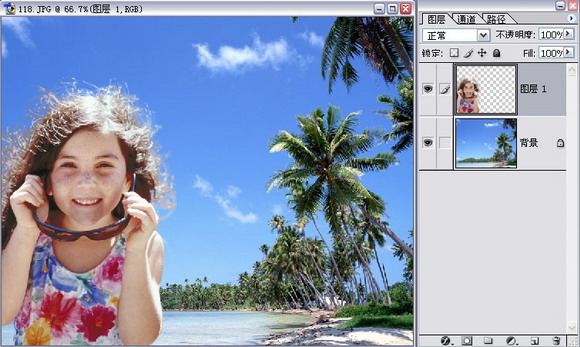
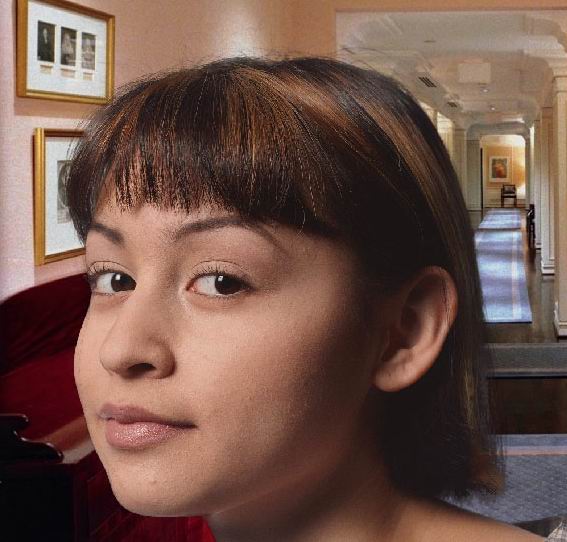
放置到新背景上
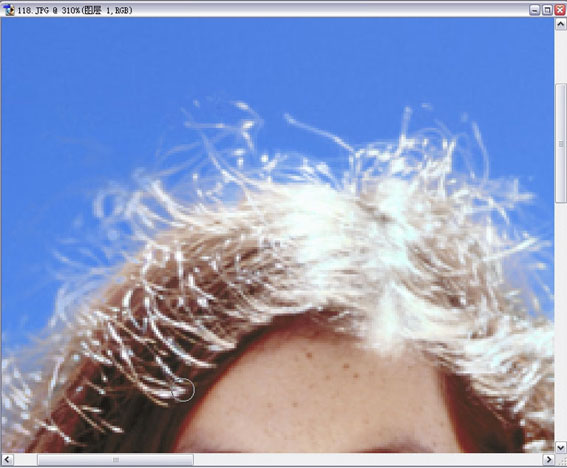
用橡皮或其他工具进行调整.---完成
以上都是一些个人的心得,有不准确的地方还请指正.
(这也是用KnockOut 2.0 抠的)
没有此插件的朋友请去http://www.xg098.com/Soft/Soft_1817.htm下载
强大的扣图软件KnockOut 1.5,大家已经很熟悉了.现在KnockOut 2.0已经发布,并且作为photoshop的内部插件,下面我来介绍一下KnockOut 2.0的基本操作,对于用ps扣图有疑惑的朋友可以考虑使用这个滤镜.
这是Croel KnockOut 1.5的界面,当时他还是作为一个独立的软件.

首先打开一张图象,双击背景层,转换为图层0.

滤镜-------KnockOut----------载入工作图层(这时photoshop会自动关闭,并开启KnockOut 2.0)

用 对象内部 工具画出如图的选区,注意不要画到毛发的边缘上.可以留有适当的距离(shift---加选区 Alt-----减选区).

用 对象外部 工具画出头发外部的选区,这一步要细一些.(shift---加选区 Alt-----减选区).
说明:对象内部 工具画出的选区表明保留部分,对象外部 工具画出的选区外部为删除部分,两个选区之间部分就是图象的边缘.(个人理解)

细调.(调节不同的选区要用不同的工具)

单击下面的"处理"按钮,进行扣图预览,并且可以指定不同的背景色.

如果发现问题可以用Ctrl+1回到原稿,进行修改.

为了更好的观察,也可以在背景上放置一张位图(如图)

确认没有问题,选择"应用"------回到photoshop

放置到新背景上

用橡皮或其他工具进行调整.---完成

以上都是一些个人的心得,有不准确的地方还请指正.
(这也是用KnockOut 2.0 抠的)

推荐继续学习,上一篇ps教程:Photoshop打造立体水晶效果 下一篇ps教程:让你明白:Photoshop蒙板全攻略
学习更多ps教程

