Photoshop打造超酷火影忍者卡卡西
要点:
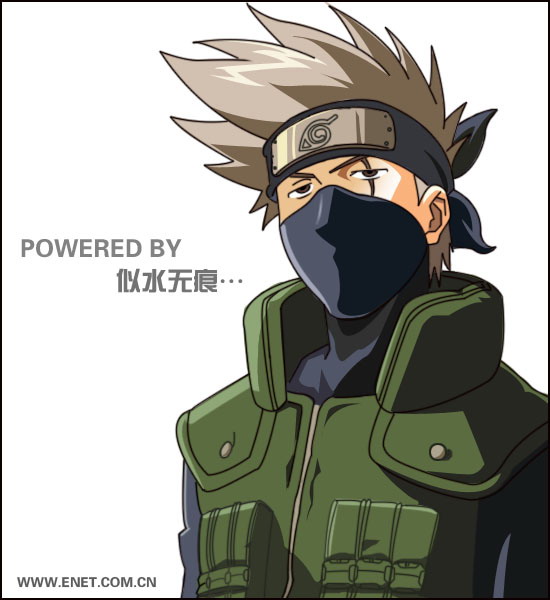
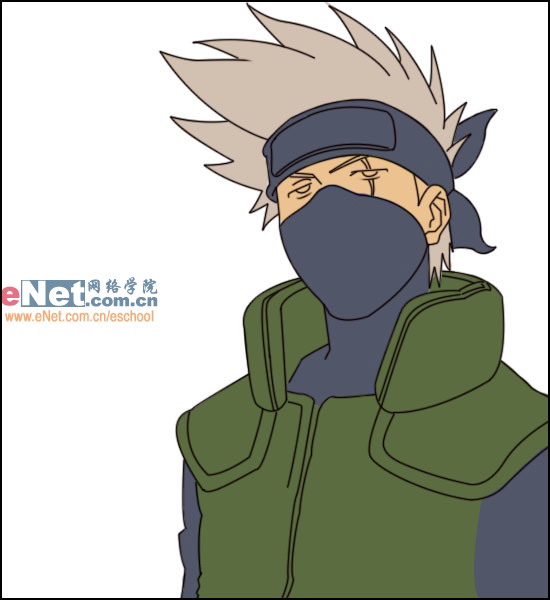
先看一下效果:
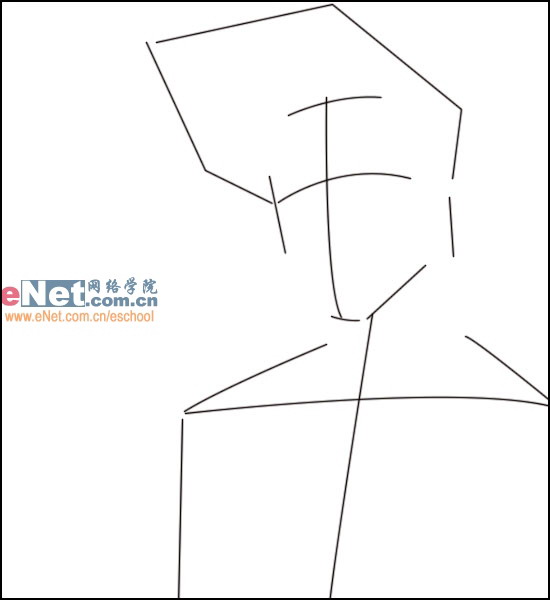
1.先用钢笔工具简单勾出轮廓。
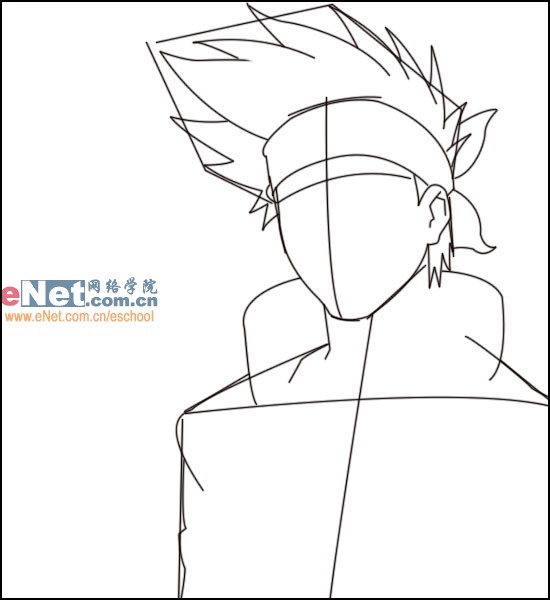
2.新建一层,继续用钢笔勾出轮廓细节部分。头发部分注意其平滑度。
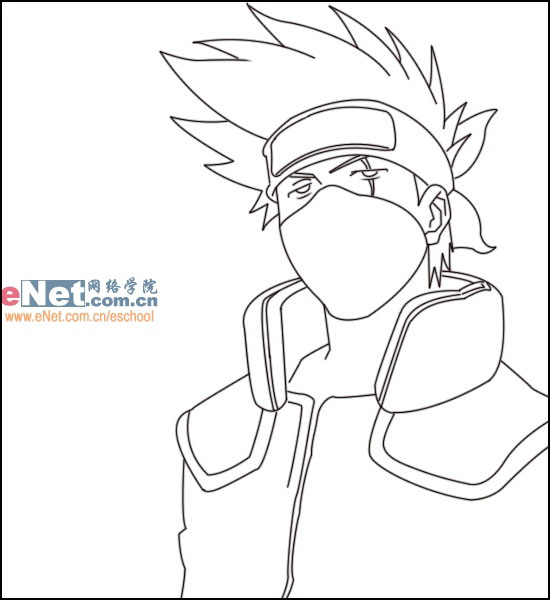
3.去除初始轮廓层,勾出卡卡西的五官与衣服。画笔主直径为2像素。
4.衣服与面罩简单铺色,颜色是深蓝与橄榄绿。

5.头发与面部铺色,分别是肉灰与肉色。
6.铺上面罩与头发的深色部分。方法是先用钢笔工具勾出深部闭合的区间,然后按“CTRL+ENTER”转变为选区,然后填充即可。

7.用相同的方法突出脖子的立体感。面部提出高光方法是用钢笔勾出高光的区域然后用渐变填充。
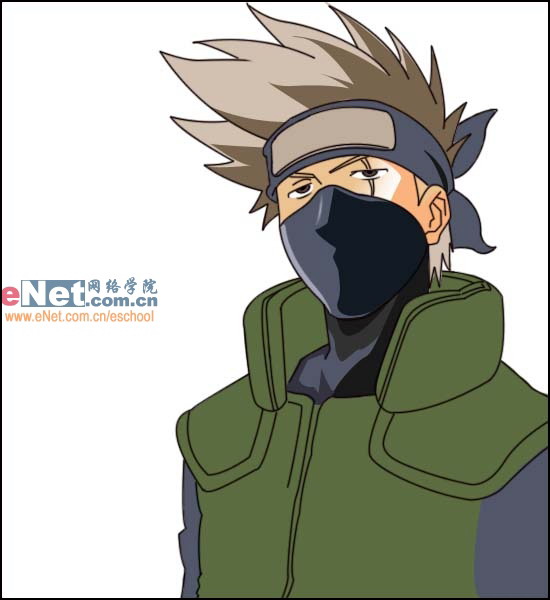
8.填充衣服的阴影部分,用墨绿色铺上整体的色块。头上的金属牌和头发的颜色相同。再用淡黄色提出高光。
9.补上衣服的口袋等其它细节部分并做最后的细节调整。口袋的阴影应与衣服的皱褶相协调。
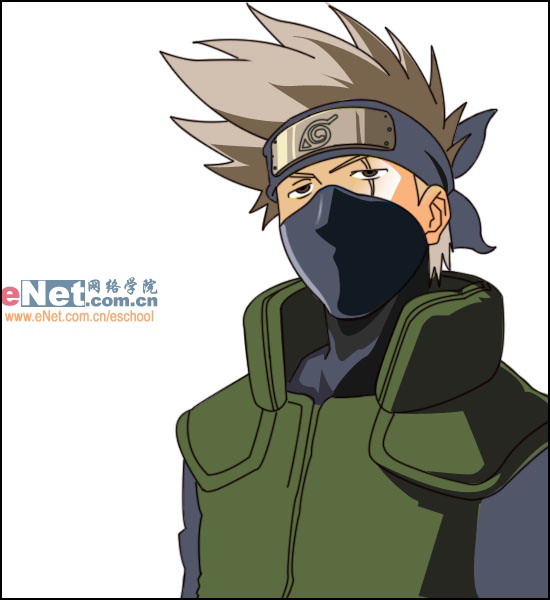
10.最终效果
先看一下效果:
1.先用钢笔工具简单勾出轮廓。
2.新建一层,继续用钢笔勾出轮廓细节部分。头发部分注意其平滑度。
3.去除初始轮廓层,勾出卡卡西的五官与衣服。画笔主直径为2像素。
4.衣服与面罩简单铺色,颜色是深蓝与橄榄绿。
5.头发与面部铺色,分别是肉灰与肉色。
6.铺上面罩与头发的深色部分。方法是先用钢笔工具勾出深部闭合的区间,然后按“CTRL+ENTER”转变为选区,然后填充即可。
7.用相同的方法突出脖子的立体感。面部提出高光方法是用钢笔勾出高光的区域然后用渐变填充。
8.填充衣服的阴影部分,用墨绿色铺上整体的色块。头上的金属牌和头发的颜色相同。再用淡黄色提出高光。
9.补上衣服的口袋等其它细节部分并做最后的细节调整。口袋的阴影应与衣服的皱褶相协调。
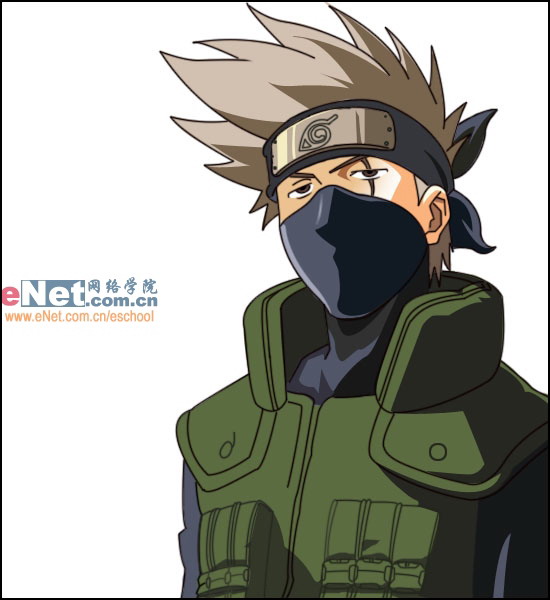
10.最终效果
推荐继续学习,上一篇ps教程:用Photoshop教你打造神秘炫光黑洞 下一篇ps教程:用Photoshop教你打造美丽魔幻星云
学习更多ps教程