Photoshop教你鼠绘超酷忍者神龟
要点:鼠绘超酷忍者神龟
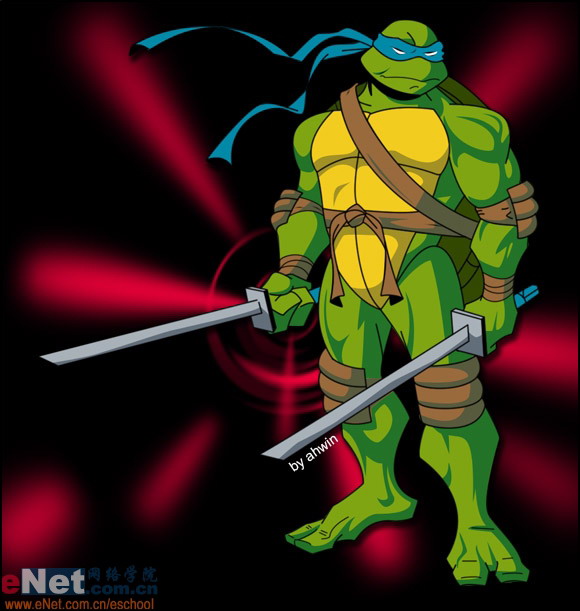
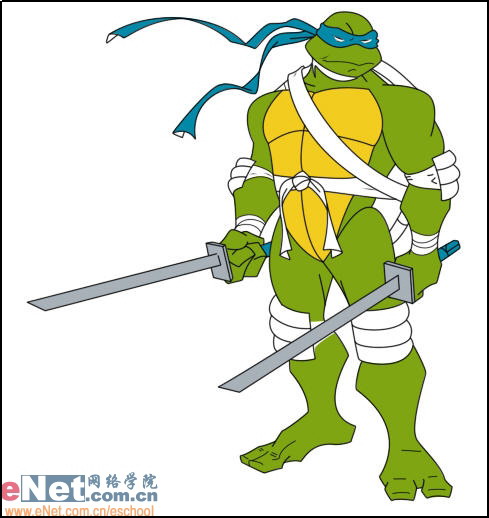
先看一下效果:
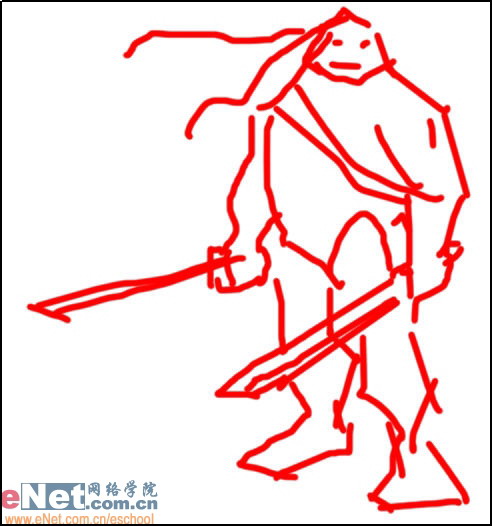
1)首先新建图层使用画笔工具随便选择一种颜色(这里我用红色)绘制出神龟的草图,画的不像样也没有关系,不过大致位置要尽量保持准确。(如图所示)
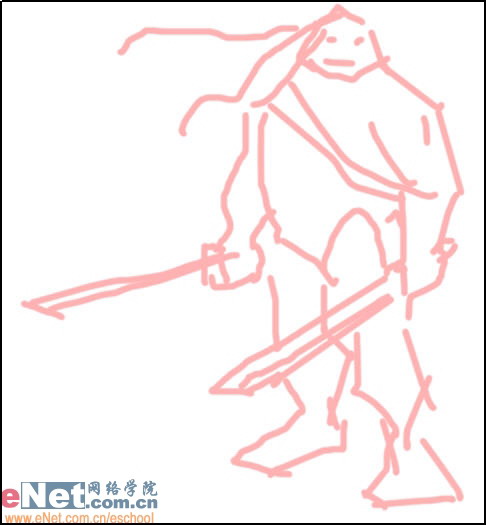
2)降低草稿图层透明度。(如图所示)
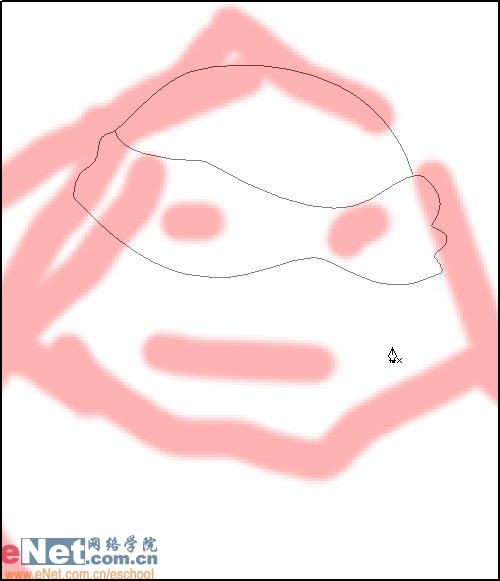
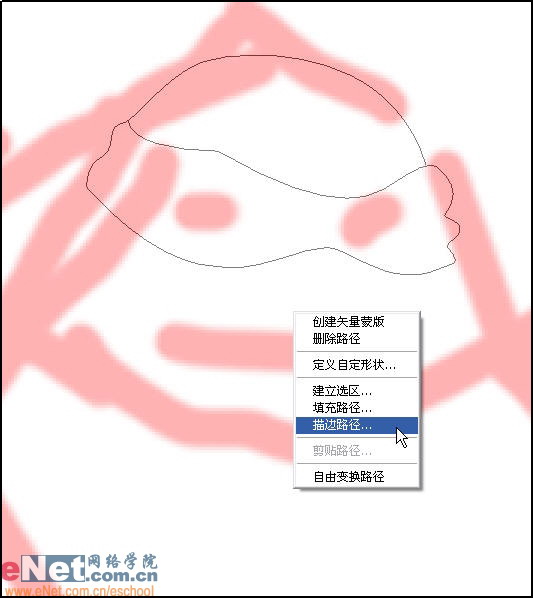
3)选择使用钢笔工具,根据草图的大致轮廓勾画出“龟头”的路径。(如图所示)
4)画出路径之后,再新建图层。在画布上单击鼠标右键,选择“描边路径”。(如图所示)
5)在描边路径对话框中选择画笔工具,点击确定按钮。(如图所示)
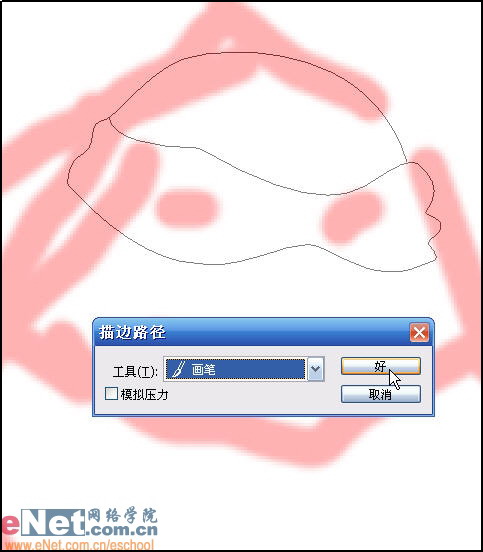
6)这样我们就描出了我们刚才绘制的乌龟脑袋的路径。很简单。(如图所示)
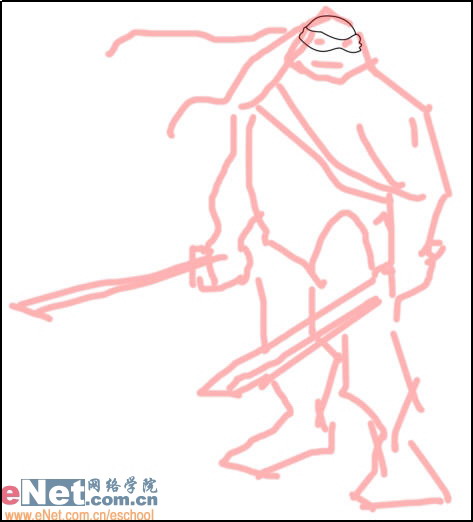
7)使用同样的方法绘制其他的部分。(如图所示)
8)我选择从“龟头”开始从上往下。(如图所示)
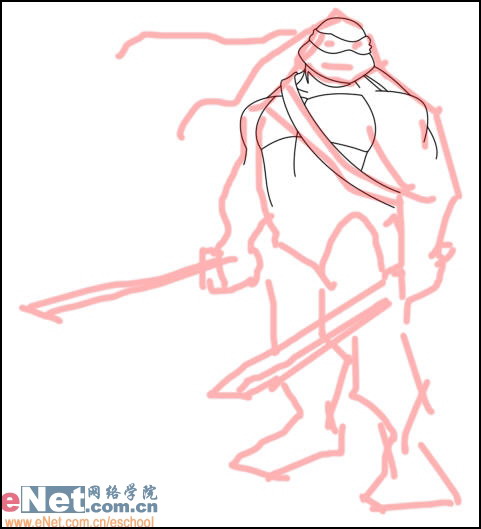
9)先着重画出大的轮廓。小地方可以稍后修饰。(如图所示)
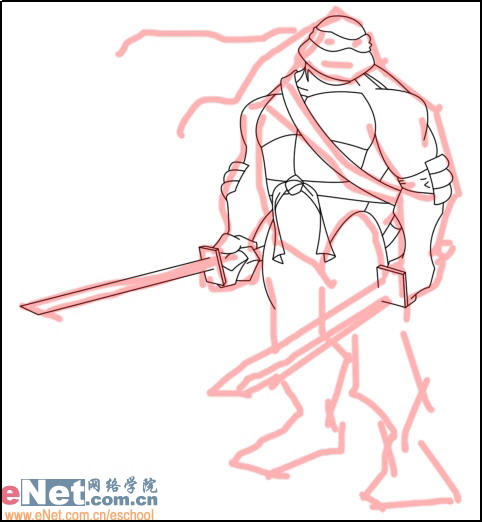
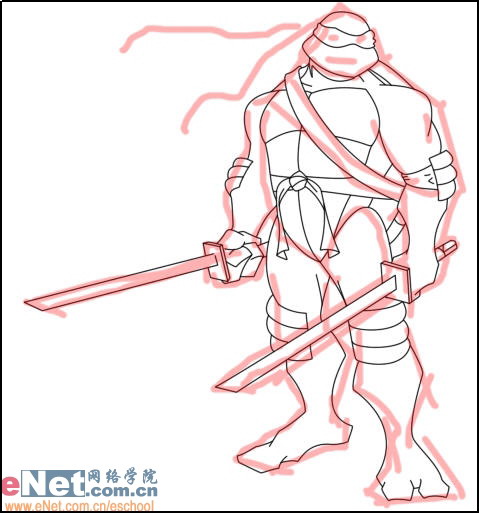
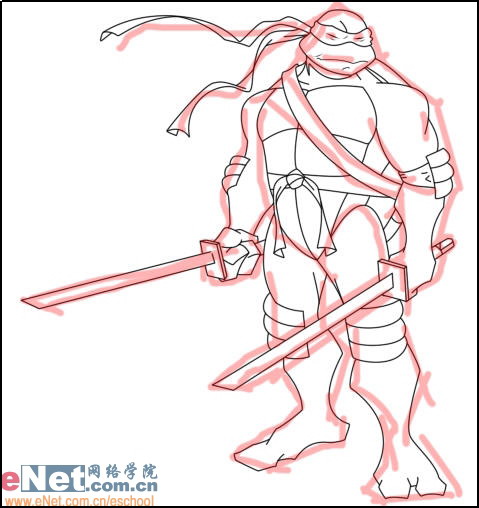
10)渐渐的绘制出乌龟兄弟的全身。(如图所示)
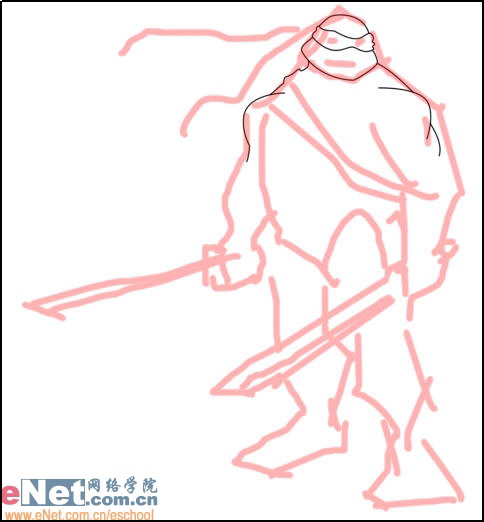
11)现在就开始做一些小的修饰,比如头绳阿,皮肤褶皱之类(如图所示)
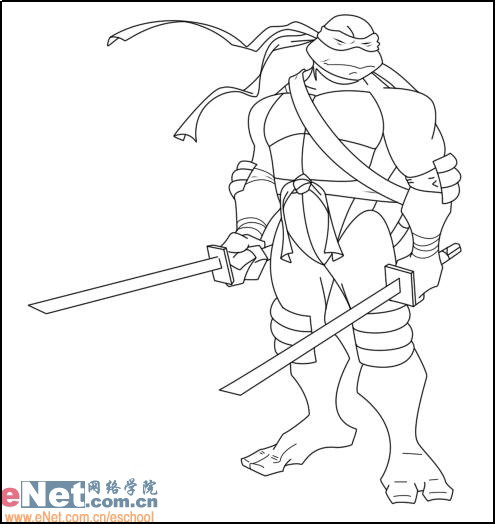
12)进行到这一步,就完成了线稿的绘制。(如图所示)
13)线稿完成后,就开始上色。可以选择自己使用顺手的选区工具进行填充区域选择。(如图所示)
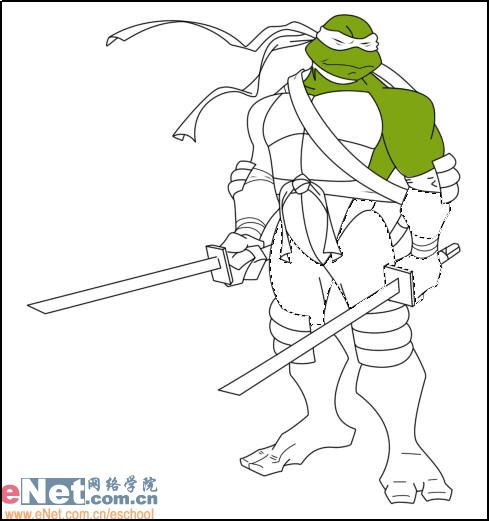
14)乌龟主要还是绿色的,完成他主体颜色。(如图所示)
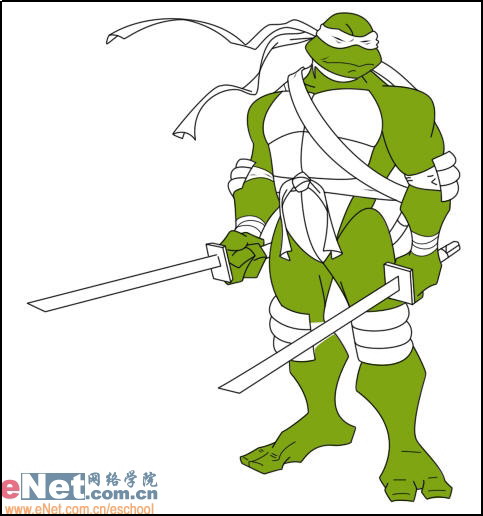
15)给乌龟兄弟的肚皮上色。(如图所示)
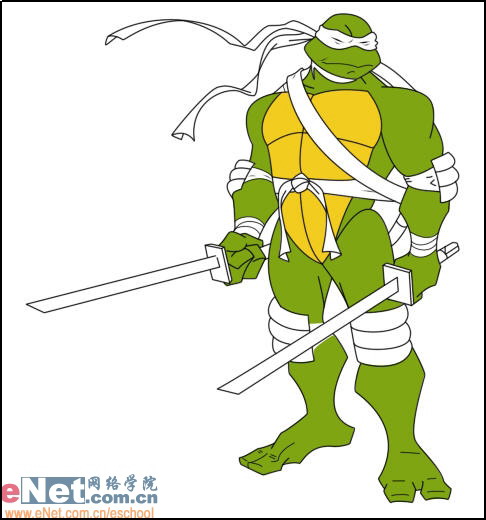
16)给头带还有双刀上色。(如图所示)
17)给身上的其他部分上色。(如图所示)
18)使用选区选择出人物身体的阴暗部分。并填充阴影颜色。(如图所示)

19)填充后的效果。(如图所示)
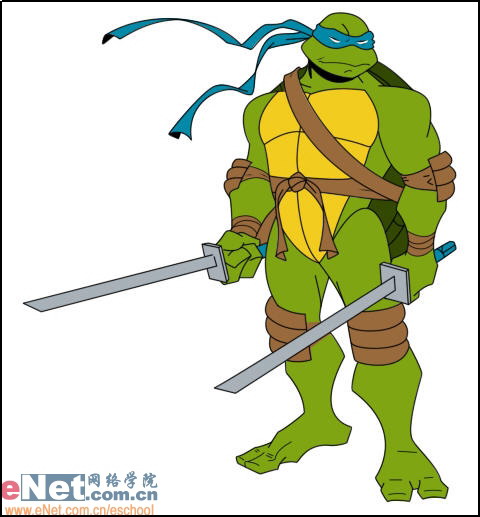
20)同样的方法建立棕色部分的阴影选区并填充。(如图所示)
21)给双刀上阴影,并修饰一些细节。(如图所示)
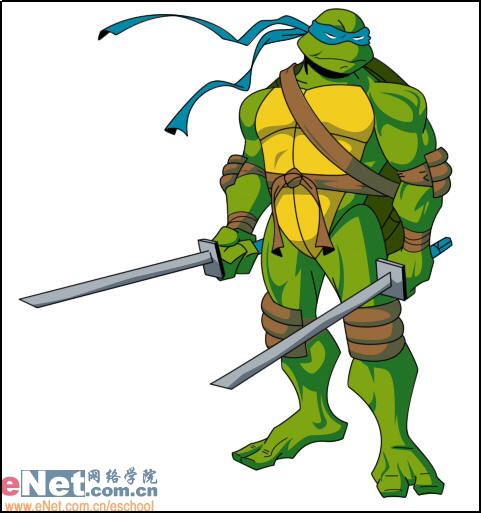
22)加上背景。就完成了~!谢谢大家捧场~~~!
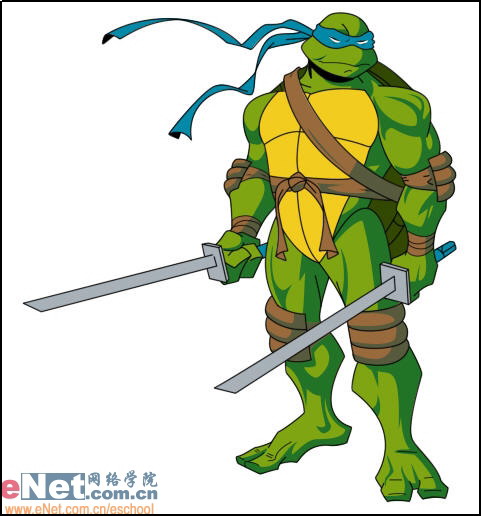
先看一下效果:
1)首先新建图层使用画笔工具随便选择一种颜色(这里我用红色)绘制出神龟的草图,画的不像样也没有关系,不过大致位置要尽量保持准确。(如图所示)
2)降低草稿图层透明度。(如图所示)
3)选择使用钢笔工具,根据草图的大致轮廓勾画出“龟头”的路径。(如图所示)
4)画出路径之后,再新建图层。在画布上单击鼠标右键,选择“描边路径”。(如图所示)
5)在描边路径对话框中选择画笔工具,点击确定按钮。(如图所示)
6)这样我们就描出了我们刚才绘制的乌龟脑袋的路径。很简单。(如图所示)
7)使用同样的方法绘制其他的部分。(如图所示)
8)我选择从“龟头”开始从上往下。(如图所示)
9)先着重画出大的轮廓。小地方可以稍后修饰。(如图所示)
10)渐渐的绘制出乌龟兄弟的全身。(如图所示)
11)现在就开始做一些小的修饰,比如头绳阿,皮肤褶皱之类(如图所示)
12)进行到这一步,就完成了线稿的绘制。(如图所示)
13)线稿完成后,就开始上色。可以选择自己使用顺手的选区工具进行填充区域选择。(如图所示)
14)乌龟主要还是绿色的,完成他主体颜色。(如图所示)
15)给乌龟兄弟的肚皮上色。(如图所示)
16)给头带还有双刀上色。(如图所示)
17)给身上的其他部分上色。(如图所示)
18)使用选区选择出人物身体的阴暗部分。并填充阴影颜色。(如图所示)
19)填充后的效果。(如图所示)
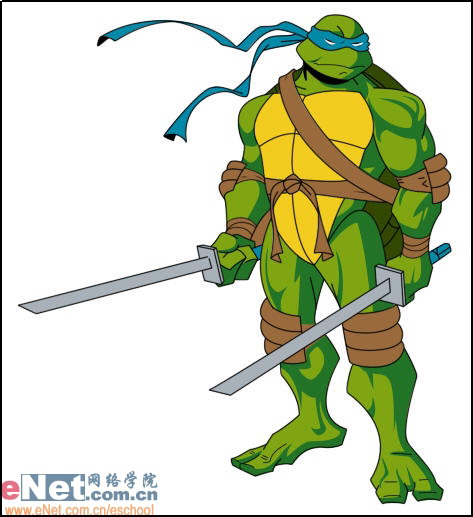
20)同样的方法建立棕色部分的阴影选区并填充。(如图所示)
21)给双刀上阴影,并修饰一些细节。(如图所示)
22)加上背景。就完成了~!谢谢大家捧场~~~!
推荐继续学习,上一篇ps教程:用Photoshop教你打造蛇皮文字效果 下一篇ps教程:Photoshop教你打造创意鼠标法拉利
学习更多ps教程