入门:Photoshop打造完美虚线攻略
要点:入门
先看看虚线效果

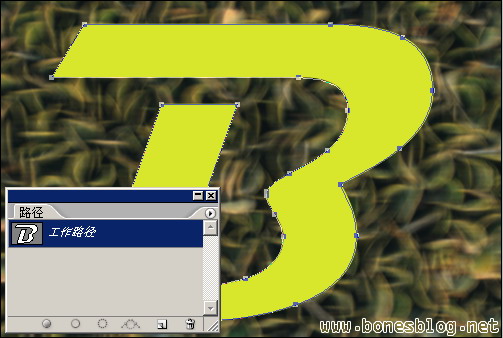
键入一个字母“B”,并设定颜色为黄绿色

执行“图层>文字>创建工作路径”,此时路径调板中出现“工作路径”
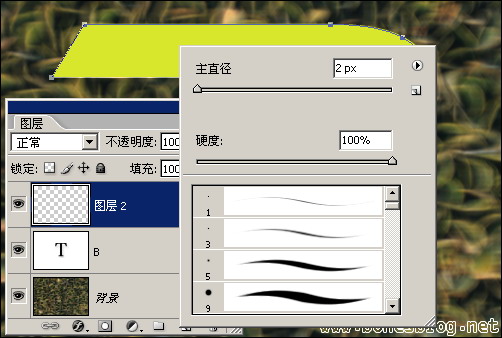
在图层调板中新建图层,选择工具箱中的画笔工具,在画布上单击右键,即可弹出画笔的选项框,在选项框里设置画笔的主直径为2px,硬度为100%。
在回到路径调板中,将“[u]工作路径[/u]”向下拖曳到“用画笔描边路径”的按钮上,我拖了两次
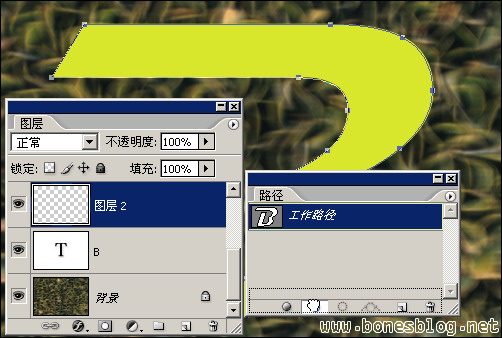
下图就是描边的结果

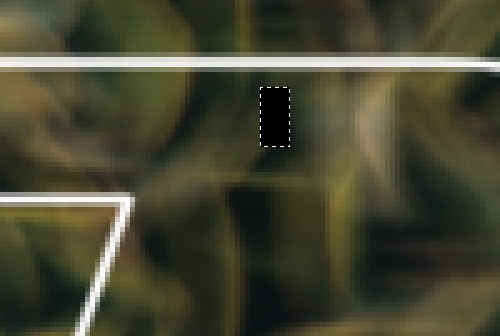
使用放大工具,放大一些,为了是看清楚描边,使用矩形工具拖曳出一个矩形的选区,这个选区的大小要比你的描边略大一些,宽度既是虚线的间隔宽度。

填充成黑色
执行“编辑>定义画笔预设”命令,在弹出的对话框中设定画笔的名称
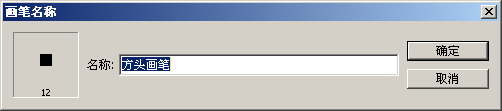
单击“确定”按钮,完成画笔的定义,再按DEL键,将黑色的填充删除,再取消选择
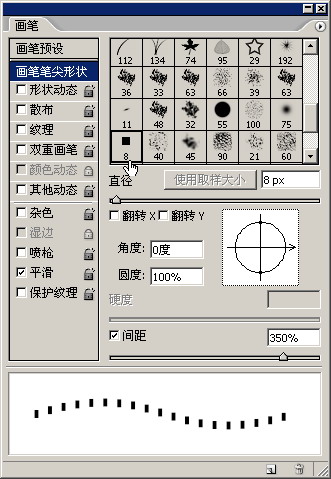
在工具箱中选择橡皮擦工具,执行“窗口>画笔”命令, 调出画笔调板,在画笔调板中选择上个步骤所定义的画笔,并将“间距”设定为350%

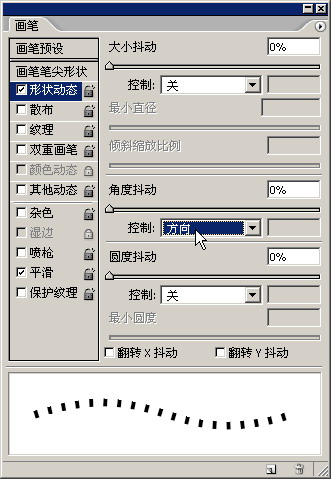
将画笔调板中“形状动态”前的“√”选中,在“角度抖动”的“控制”后的下拉选项中选择“方向”
再次回到路径调板,将“路径”向下拖曳到“用画笔描边路径”的按钮上,即可用橡皮擦擦出虚线的效果
再将文字图层“B”显示,我降低了图层的不透明度
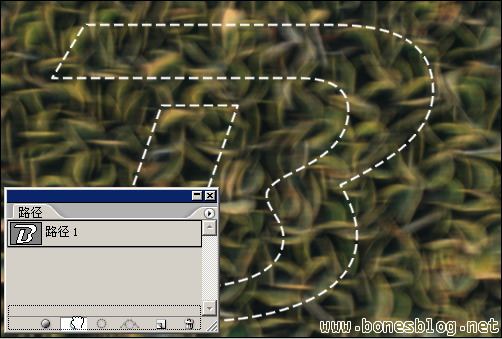
最终效果
先看看虚线效果
键入一个字母“B”,并设定颜色为黄绿色
执行“图层>文字>创建工作路径”,此时路径调板中出现“工作路径”
在图层调板中新建图层,选择工具箱中的画笔工具,在画布上单击右键,即可弹出画笔的选项框,在选项框里设置画笔的主直径为2px,硬度为100%。
在回到路径调板中,将“[u]工作路径[/u]”向下拖曳到“用画笔描边路径”的按钮上,我拖了两次
下图就是描边的结果
使用放大工具,放大一些,为了是看清楚描边,使用矩形工具拖曳出一个矩形的选区,这个选区的大小要比你的描边略大一些,宽度既是虚线的间隔宽度。
填充成黑色
执行“编辑>定义画笔预设”命令,在弹出的对话框中设定画笔的名称
单击“确定”按钮,完成画笔的定义,再按DEL键,将黑色的填充删除,再取消选择
在工具箱中选择橡皮擦工具,执行“窗口>画笔”命令, 调出画笔调板,在画笔调板中选择上个步骤所定义的画笔,并将“间距”设定为350%
将画笔调板中“形状动态”前的“√”选中,在“角度抖动”的“控制”后的下拉选项中选择“方向”
再次回到路径调板,将“路径”向下拖曳到“用画笔描边路径”的按钮上,即可用橡皮擦擦出虚线的效果
再将文字图层“B”显示,我降低了图层的不透明度
最终效果
推荐继续学习,上一篇ps教程:Photoshop打造金属质感天坛铜板画 下一篇ps教程:Photoshop打造漂亮迷人的蛋壳美人
学习更多ps教程