路径工具勾图、去底的方法技巧
要点:路径工具勾图、去底,方法技巧
路径工具( 钢笔工具)在PhotoShop中运用非常广泛,退底、勾形等等都少不了它。可许多人对它很难上手,初学者容易勾断线,而入门后也常为多次修改也勾不准而烦恼。现在我们就以一个实例介绍一下路径工具和退底的一些小技巧
一、勾图退底的“规范”动作:
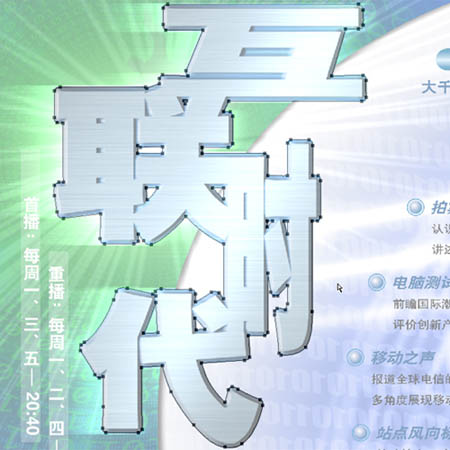
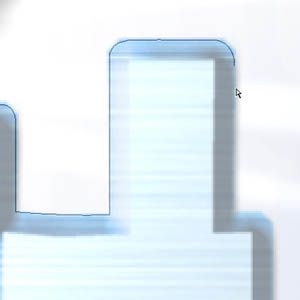
这是原图,本例的目的就是用路径工具把“互联时代”四个字退底“挖”出来。

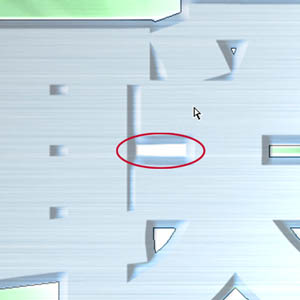
退底勾图,是一定要把需“掏穿”的地方勾到的,千万不要忘了
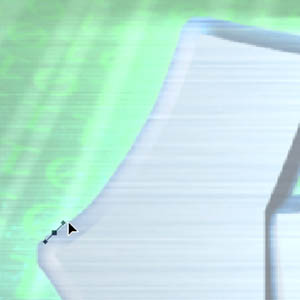
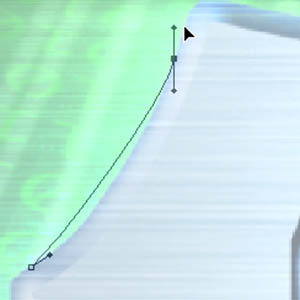
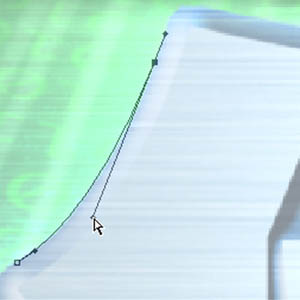
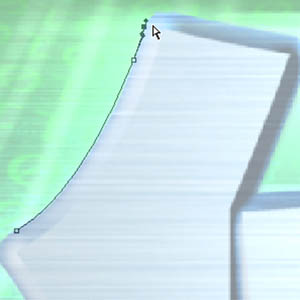
总之,在形状复杂的地方一定要多画几个点,形状单纯的地方可少画一些,这样就能勾得又快又准、事半功倍。
最后,按住Ctrl+回车键在Path面板单击勾的路径转成选择范围

为何容易勾断线?
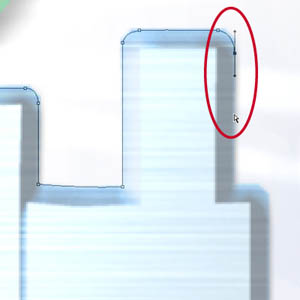
初学者勾断线时一般是勾到一段时,就不自觉地换了其它工具(或用快捷键换了工具),再回来勾时可能已经是在勾第二条路径了。
所以初学者在勾路径时要注意最好不要换工具,也不要不自觉地按键盘,因为PhotoShop的快捷键非常的多,一不小心你就已经不是在用路径工具了。
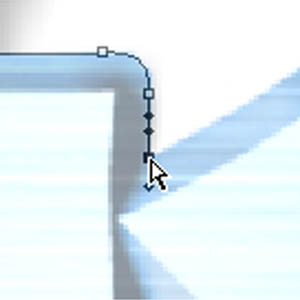
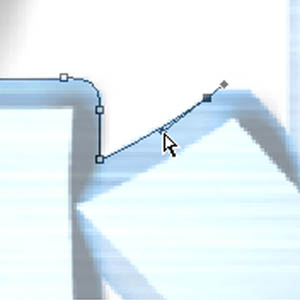
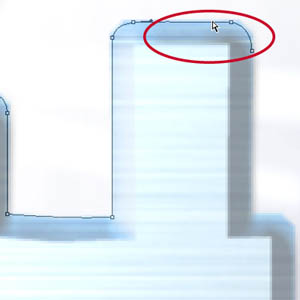
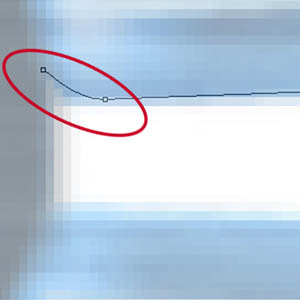
如果万一不小心勾断了线(如图4-1),可以用如下方法接上:

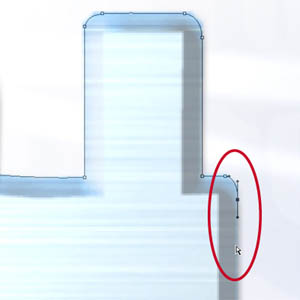
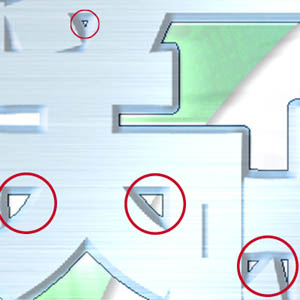
细部很难用眼力直接看准的地方,一定要用Ctrl+空格框选放得很大来勾
在勾图时,请一定要注意,勾线的最佳位置是在图像轮廓的齿形虚化边的里侧,而不是正正在虚化边上
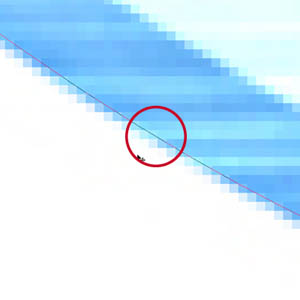
这是因为PhotoShop图像轮廓边缘一般都一个虚化的范围(要特别放大才能发现),这样退的底会把这个虚化范围下显露出的背景色也一块“挖”出来了

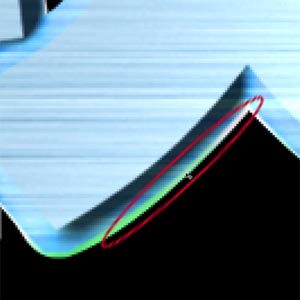
所以要想图退得好,不但要勾得准,还要勾得有技巧(比实际图象小一点),这样才能退得漂亮、干净不留“白”!
提醒:PhotoShop中,当用白箭头(按住钢笔工具不动复选)框选路径时,是可以用Ctrl+T对路径本身进行变形操作的。
勾路径时,按住Shift键,可以很容易勾出水平、竖直和45度倾角的路径。
以上介绍的路径勾画部分不但适用于PhotoShop,对Illustrator、FreeHand等软件的路径操作也一样适用。
路径工具( 钢笔工具)在PhotoShop中运用非常广泛,退底、勾形等等都少不了它。可许多人对它很难上手,初学者容易勾断线,而入门后也常为多次修改也勾不准而烦恼。现在我们就以一个实例介绍一下路径工具和退底的一些小技巧
一、勾图退底的“规范”动作:
这是原图,本例的目的就是用路径工具把“互联时代”四个字退底“挖”出来。
退底勾图,是一定要把需“掏穿”的地方勾到的,千万不要忘了
总之,在形状复杂的地方一定要多画几个点,形状单纯的地方可少画一些,这样就能勾得又快又准、事半功倍。
最后,按住Ctrl+回车键在Path面板单击勾的路径转成选择范围
为何容易勾断线?
初学者勾断线时一般是勾到一段时,就不自觉地换了其它工具(或用快捷键换了工具),再回来勾时可能已经是在勾第二条路径了。
所以初学者在勾路径时要注意最好不要换工具,也不要不自觉地按键盘,因为PhotoShop的快捷键非常的多,一不小心你就已经不是在用路径工具了。
如果万一不小心勾断了线(如图4-1),可以用如下方法接上:
细部很难用眼力直接看准的地方,一定要用Ctrl+空格框选放得很大来勾
在勾图时,请一定要注意,勾线的最佳位置是在图像轮廓的齿形虚化边的里侧,而不是正正在虚化边上
这是因为PhotoShop图像轮廓边缘一般都一个虚化的范围(要特别放大才能发现),这样退的底会把这个虚化范围下显露出的背景色也一块“挖”出来了
所以要想图退得好,不但要勾得准,还要勾得有技巧(比实际图象小一点),这样才能退得漂亮、干净不留“白”!
提醒:PhotoShop中,当用白箭头(按住钢笔工具不动复选)框选路径时,是可以用Ctrl+T对路径本身进行变形操作的。
勾路径时,按住Shift键,可以很容易勾出水平、竖直和45度倾角的路径。
以上介绍的路径勾画部分不但适用于PhotoShop,对Illustrator、FreeHand等软件的路径操作也一样适用。
推荐继续学习,上一篇ps教程:精美:鼠标手绘作品两幅 下一篇ps教程:用PS+IR制作翻页动画
学习更多ps教程