Photoshop照片处理:明星的身体我的脸
要点:明星,身体
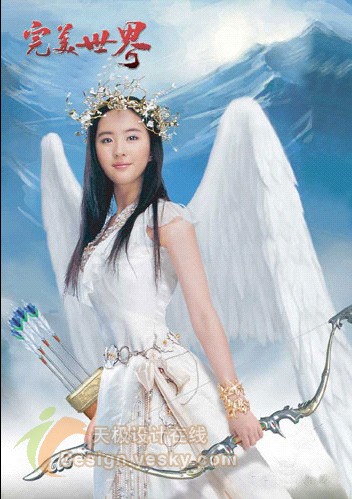
原图 
素材(选择素材的时候注意人物的角度) 
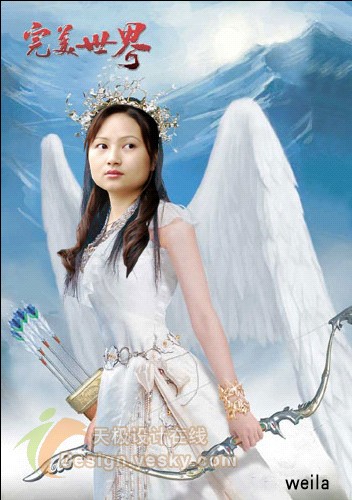
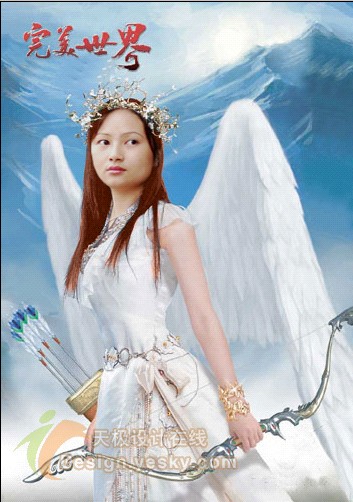
合并效果 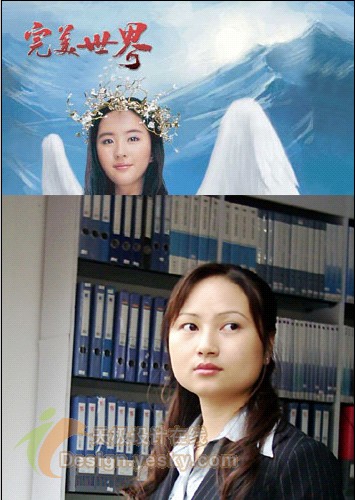

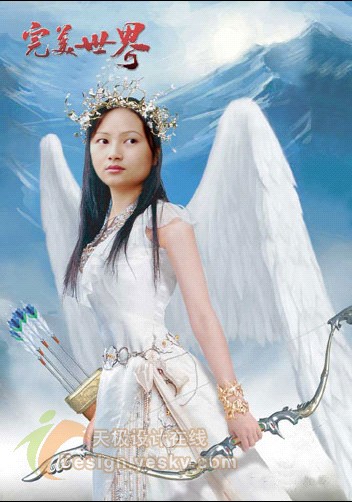

今天我们用Photoshop来玩一个“移花接木”,将一张照片的头像搬到另一张图片上去。很多超市里面的简易数码婚纱也是用类似的方法做出来的。
为照顾初学者,这个例子里面我们主要用的是Photoshop的橡皮擦工具,技术上并不难,但是需要有足够的耐心。
先看看效果:
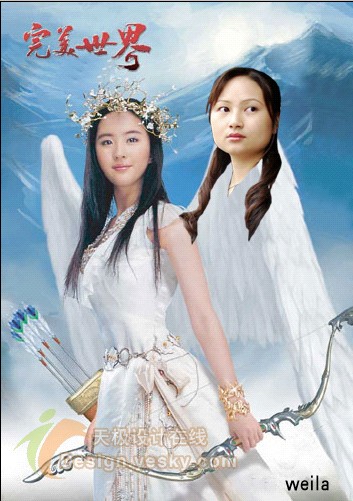
一、在Photoshop中打开需要处理的两张照片,并将它们拖到同一张画布上:
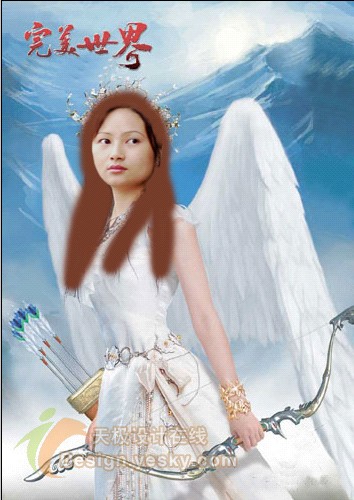
二、将需要变脸的MM的多余部分删除,如下图:
三、用橡皮擦将人物中多余的背景擦掉(注意不要把脖子给擦掉了)
四、和底图重合:
五、继续用橡皮擦擦除多余的部分特别是擦花冠处的时候要仔细,把笔触调小一点:
六、基本完成,但是头发不太协调,需要再处理一下。
新建一个图层,位于两张图片图层的中间,用吸管工具在MM的头发上选择一点偏红的色彩,用画笔工具画在底图的头发上:
七、改变此图层的混合模式为颜色:
八、再用橡皮工具把多余的擦掉就可以了。
推荐继续学习,上一篇ps教程:极坐标滤镜的无限创意壁纸设计 下一篇ps教程:PHOTOSHOP超级眼睛换色法
学习更多ps教程